photography project ideas to boost your creativity this year

7 photography project ideas to boost your creativity this year

I’ve loved taking photos ever since I was a child and I got my first basic point and shoot film camera.

But there are still those times when my creativity dries up and I feel completely uninspired, with no motivation to even pick up my camera.

When this happens and I want to get my love for photography back I find starting a project or a challenge is quite a good way to get the creativity flowing again.  It gives me a focus and a reason to pick up the camera again, and then once I get going I remember why I love it all so much.

If you ever find yourself in a creative dry-spell, or maybe you’re new to photography and want something to challenge you, then finding a fun photography challenge could work for you too.

Whether you want a quick challenge to get the creativity flowing or something bigger to get your teeth into, here are some ideas to get your creativity going and hopefully help you fall in love with photography.

Quick photography projects for a burst of creativity

1. One subject, ten ways

This is a really simple project to get started with – all you need to do is pick a subject and then take 10 different photos of it.

You can up the stakes by trying to take all 10 photos in a limited amount of time, like 10 minutes.  Or you can really take your time with it and think about all your options.

To get real variety in your 10 photos you can:

  • photograph from up high above your subject, and then low down below it
  • photograph it from all sides and all angles
  • get in close and take macro, detail photos
  • move back a bit and show the subject in the scene
  • mix up your settings – shoot wide open and then change to a smaller aperture
  • move your subject to take advantage of different light sources


2. Toy story

If you’re stuck at home in lockdown then you might need to get creative with the things around you, and for us parents that’s most likely to be toys.

Grab your child’s favourite teddy or some little playmobil figures, then set them up in different scenes around the house and photograph them.

You could create photos of teddy enjoying a tea party with your child, or sitting up in their bed ‘reading’ a book.

Or you can do what we did a while ago and take the toys out with you on your family walk and photograph them in big, outdoor scenes.


3. Day in the life

Life might feel repetitive and not particularly photo-worthy at the moment, but these are days that are absolutely worth recording.

Pick a day that you think will be pretty representative of life right now and then take photos throughout the day to capture everything.

If you’re not sure what to actually photograph through the day here are some ideas to get you started:

  • your morning – a hot cup of coffee on the table, early morning cbeebies with little ones, small hands holding bottles of milk, and brightly coloured bowls of cereal
  • your daily activities – children engaged in online lessons, little hands holding toys and books, your makeshift desk at the kitchen table, and muddy shoes on a family walk
  • mealtimes – favourite foods and snacks, messy highchairs, lunches on laps, and the details of preparing meals
  • your evening – the bath and bed routine with young children, blankets and books on the sofa, the toys left scattered all over the floor, and a glass of whatever it is you drink in the evenings to relax!

Bigger photography projects to keep you inspired all year long

1. Project 365

If you’re up for really getting stuck into a project then this one is a great option.  It’s a really simple concept – just take one photo every day – but can be surprisingly tricky to follow through with.

Here are some tips to help:

  • don’t box yourself in – give yourself the freedom to photograph anything at all each day, go with the flow and just see what catches your eye
  • pick a theme – on the other hand, you might find it easier to choose a theme or subject to photograph each day
  • don’t stress about a missed day – if you go a day or two without taking a photo don’t give in, just pick the project up again when you’re ready
  • create a list of photo ideas – any time you come up with extra ideas for photos to take, note them down to use on days you’re not so inspired


2. 10 on 10

If taking a photo every single day for a year sounds like too much of a commitment, then a 10 on 10 project is a great alternative.

I’ve been doing this project for a few years now and still absolutely love it.

All it involves is taking 10 photos on the 10th of each month.  So you’re basically taking the day in the life idea and repeating it once a month, to capture your family life throughout the year.


3. Try a new skill each month

Pick something out of your comfort zone to learn about, explore and have fun with.

If you’re relatively new to photography this might be:

  • exploring aperture, practising shooting wide open, learning about depth of field
  • playing with shutter speeds, freezing and blurring movement
  • getting creative with following and then breaking the rules of composition


If you’ve been taking photos for a while and are comfortable with the basics then you could push yourself by:

  • only taking black and white photos, playing with high key and low key images
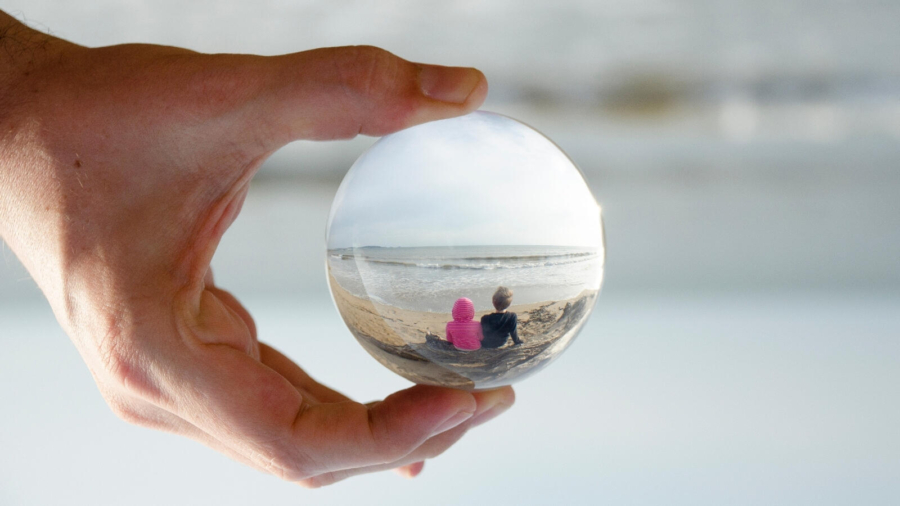
  • trying a completely new genre for you, like food photography, or play around with a new piece of equipment like a lens ball
  • limit yourself to just using one focal length for all your photos, see what you can create with just your 35mm lens on your camera


A bonus project your whole family will love – Show you were there

The last idea to push your creativity this year is to get yourself in photos.

You can keep it simple and just spend ten minutes setting up your camera and taking a self portrait.  Or you can go all in with this idea and join me in taking a photo with you in it every day for a month.

I’ve been doing this every March for a few years now and absolutely love it.  It’s a real challenge at times, and some days I don’t manage it, but it’s a fantastic way to stretch yourself, get more creative and practice different photography skills.

The real bonus of this project is that your children get the benefit of you existing in more and more photos, something you’ll all be so grateful for as they get older.

If you’re not sure where to start with this then have a read of my ultimate list of photo ideas to get yourself in more pictures.  And before you start with all the excuses about why you don’t want to get in front of the camera, pop over and read this.


Hopefully at least one of these photography project ideas has got you excited to pick up your camera and get your creativity flowing again.

Have you done any of these before?

Which one are you most excited about trying?

Exposure - how to photograph your family and life

How to photograph your family and your life – All about exposure

If you want to learn a bit about photography, to be able to take photos of your family that you’re proud of, and finally get your camera off auto mode, then you’re in the right place.

This post is part of a series that will give you the basics you need to feel more comfortable with your camera.  The series will give you the information in a way that’s (hopefully!) easy to understand, as well as suggesting ideas to try out to put your new skills into practice as you go.

Each post in the series will focus on a different aspect of photography, so you can get to grips with one thing before moving on to the next.

This time the focus is on exposure.


Exposure is all about how much light reaches the camera’s sensors when you take a photo.

The more light that enters the camera (the more the sensor is exposed to light), the brighter the photo will be.

And when less light is let into the camera (the sensor is exposed to less light) the result is a darker photo.

To get the right level of exposure to create the photo you want, you need to control three things:

  • aperture
  • shutter speed
  • ISO

I’ve written beginner’s guides to aperture and shutter speed, so if you want more detail on these click the links and have a read before coming back to this post.


In the meantime, here’s a basic overview:

Aperture

This is the amount that the lens opens up to let in more or less light.

Using a small aperture will result in a photo that is darker, and a large aperture will produce a lighter photo.

Aperture also affects depth of field, or how much of the photo is in sharp focus.


Shutter speed

This refers to how long the shutter is open for when you take a photo.

A fast shutter speed means the shutter opens and closes again quickly, so less light is let into the camera.  It also lets you freeze the action and keep moving objects sharp and clear in the photo.

A slow shutter speed means the shutter stays open for longer, so more light gets in.  It also lets you create motion blur as movement is shown in the photo.


ISO

ISO refers to how sensitive the camera’s sensor is to light.

A higher ISO number means that the sensor is more sensitive to light, so you don’t need to let as much light in to expose the image.

The issue with using a high ISO is that you end up with a grainy image, so where you can it’s best to keep the ISO lower to keep your photos crisp.


All three of these elements interact with each other to create the right exposure when you take a photo.

So say you take a photo and it’s perfectly exposed but you want to change the aperture for a shallower depth of field, for example, you’ll also have to adjust either the shutter speed or the ISO to keep the photo’s exposure the same.

Take this family photo for example.

It’s nicely exposed, with the both the main subjects and the background neither too bright or too dark.


But lets say I wanted to make us stand out more in the photo by using a larger aperture to create a shallower depth of field.

To keep the exposure the same I’d need to also change the shutter speed so that it was faster, to compensate for the change in aperture.

It takes some practice, but after a while you’ll get used to balancing the shutter speed, aperture and ISO to create the perfect exposure for the photo you want.


Sometimes you might want a photo to be especially light and bright.

In this case you want to lean towards overexposing the image, so you might use a large aperture and a slightly slower shutter speed.

And other times you might want a more dark, moody image so you would chose to underexpose a bit with a smaller aperture and a slightly faster shutter speed.


So, now it’s time to start putting things into practice.

Here are some ideas for things to try with your camera on manual mode to practice different levels of exposure in your photos.


Create a high key image

A high key image is one that’s really light and bright, with hardly any shadows.

You can create an image like this by setting your camera to slightly overexpose your photos.

I love how this can be used to create bright, summery photos like this one of Nerys at the beach.

This image was taken with a really wide aperture, as you can tell by the shallow depth of field, and a relatively high ISO for the bright light conditions in the middle of the day outside.  To stop it being completely overexposed I used quite a fast shutter speed which also meant I could freeze the movement of her dress as she twirled.


This photo of Nerys was taken in our hallway on another bright, sunny day, again with a relatively high ISO and a large aperture to keep the focus on her facial features.  I love how this has blown out the white background so she stands out so much.

Your challenge is to create an image like this of your child.

On a bright, sunny day set your ISO to around 250 or 320 and then play around with a wide aperture and different shutter speeds to create photos of them that are bright and airy, but not completely overexposed.

This works best if the background behind them is quite light, so try sitting them in front of a light coloured wall, with their back to a big window, or outside with the bright sky behind them.


Go darker instead

As the winter months come in there might be less opportunities for creating bright, high key images with natural light, so try embracing the darkness instead.

One of my favourite ways to do this is to expose a photo for the highlights and let the rest of the image be dark.

What this means is you look at where the light is hitting your subject and set your exposure so that part of the photo will be nicely lit, even if it means the rest of the image seems underexposed and dark.

Take this photo of Nerys and her unicorn as an example.

It was taken early one morning in our living room, so it was still quite dark.  I could’ve tried to expose the whole image by bumping up the ISO and using a wide aperture and slower shutter speed, but I wanted the focus to be on how the unicorn was lit up.

So I kept the ISO lower and the shutter speed relatively fast while using a really wide aperture.


You can try this at home by sitting your child quite close to a window, facing the light, on a relatively gloomy day.

Then play around with the ISO, aperture, and shutter speed to get their face nicely exposed while keeping the background of the room behind them quite dark.

If your photos don’t come out the way you expect, don’t worry, it takes a while to get the balance of the three elements right.

So keep playing with the settings, and keep having fun with it until you start to understand how the three factors interact with each other.


Hopefully this post has given you a great start in understanding exposure and how ISO, shutter speed and aperture all interact to create different images.

If you have any questions please do leave me a comment and I’ll try my best to help!

Fun photography ideas for kids in lockdown

3 fun photography projects for kids to try during lockdown

We’re all likely to be spending more time at home over the next few months.

Whether we’re in a full lockdown or not, there are bound to be restrictions in place that mean we’ll be looking for different ways to keep our families entertained at home.

If you want to do something creative with your children but don’t want all the mess that comes with a lot of crafting activities then photography is a great idea.  You don’t need a fancy camera to have fun with photography either, you can use the camera on your phone, a child’s first camera like the kidizoom or a simple point and shoot camera.

I wrote a list of 5 fun photography challenges that children would enjoy a while ago, and now I’ve got 3 more projects that children of all ages can enjoy whether they’re staying safe at home or venturing out to explore the local area.


Create an ‘All about me’ photo scrapbook

First of all, set your child up with the camera on a timer or with a remote trigger and let them take some self-portraits.

Then let them take photos of the different members of the family.

If you’re able to visit friends and extended family under the restrictions that are in place where you are, then arrange for your child to take some photos of them too.

They can also take pictures of their favourite things – books, toys, foods, and so on.

Once they’ve taken all the photos you can either get them made into a photo book or get prints made and stick them into a scrapbook.  Whichever option you pick, get your child to take some time to add in some text with some details about each of the photos.


Get their toys involved in the fun

This project is so much fun for kids of all ages (and adults too!).

All you need is a small toy or two, like a lego figure or playmobil person, and then you set them up in a scene and photograph them as if they were full-sized people.

The great thing about this project is that you can keep it really simple or get really creative and set up full scenes for the figures.

We took a few figures to the park on one of our local walks, and set them up in these simple scenes, and I really love how they came out!


You and your children could have so much fun with this.

If you’re stuck in the house during lockdown or because you’re self-isolating, then you can spend a good few hours setting up scenes at home for the figures to go in.  If you had a fisherman lego figure, for example, you could set them up to look like they’re ice-fishing by freezing a bowl of water, cutting a small hole in the top and then placing the figure so it’s sitting on the ice with the fishing rod in the hole.

Your child’s imagination really is the limit with this one.


Make postcards to send to family and friends

The way things are at the moment, so many of us are unable to travel to visit our families and friends, so we need to find other ways to keep in contact.

And while we have all the technology available to phone, text and video call everyone, there’s something extra special about getting something personal in the post from a loved one.

So let you child get creative and take photos that can then be made into postcards to send to family and friends.

They could take some landscape photos if you live somewhere scenic, or photos of pretty and interesting things they find when you’re out on a walk as a family.  Or they could take some self-portraits or pictures of themselves with their siblings.


It doesn’t really matter what the photos are of, just that they’re personal and mean something to your child.

Then you can either get prints made of the pictures and glue them to cardboard to make postcards, or get some printed as postcards or cards through a company like Snapfish.


Hopefully this post has given you some ideas for fun photography projects your child can try when they’re stuck at (or near) home during lockdown.  

Even when restrictions are lifted these are all still great, creative ways to practice photography skills for children, and adults, of all ages.

Which do you think your child would enjoy the most?

Show You Were There – October round up

It’s Sunday, it’s very nearly the end of the month, and it is time for another #ShowYouWereThere round up!

If you’ve not heard of it before it’s my little Instagram community for people to share photos that feature them (or their partners) in some way.  It’s all about getting more parents in more photos, for both them and their children.

At the end of each month I pick 4 photos that have been shared with #ShowYouWereThere to include in these round ups.


My first pick for this month is from Laura at Inside Laura’s life.

It’s such a happy family photo, and I love the girls’ matching jackets!


My next pick is this smiley, soggy, selfie from Mary at Over 40 and a Mum to One.

I love all the outdoor adventures and walks that Mary and her son take together, they always look like they have so much fun!


Next up is this lovely photo of Donna from What the redhead said with her children.

There’s such an autumnal feel to this photo, with the wellies and the leaves all over the ground, and I love it!


My last choice for this month is this perfectly seasonal photo from Maria at Suburban Mum.

It’s a lovely photo of Maria, but also one that raises some awareness for the symptoms of an over-active thyroid that people might not be aware of.


Thank you so much to everyone who tags their photos #ShowYouWereThere over on Instagram, it makes me so happy seeing people getting in front of the camera more.


Now my turn.

This photo was taken a good few weeks ago, on a windy, sunny walk along the beach.  With Wales back in lockdown for a few weeks I’m really glad we live where we do so we can get our fresh air in places like this.


If you’d like to join in with my little community then all you need to do is share a photo over on Instagram that features you in some way and use #ShowYouWereThere with it.

Hope to see you over there soon!

Freeze the action photography challenge

5 minute photography challenge – freeze the action

No matter where you are on your photography journey, taking 5 minutes now and then to focus on one particular element can help you either really start to understand that particular aspect, or help get your creativity flowing again.

This particular challenge focuses on shutter speeds, and will hopefully help beginners understand how different shutter speeds can either freeze or blur movement.

And if you’re familiar with all the technicalities of shutter speeds, then this little challenge will hopefully spark your creativity as you look around for different moments in your life to capture.

So, here’s the challenge. 

Grab your camera and freeze the action.


If you’re new to photography and aren’t entirely sure what shutter speed is and how you can change it to create different types of photos, then take 10 minutes to read my ‘all about shutter speed‘ blog post and then come back here to try this challenge.

It’s a really simple challenge, but it’ll help with understanding shutter speed if you’re just starting to get your camera off auto, and it’s also a fun creative challenge if you’ve been taking photos for years and are feeling stuck in a bit of a rut.


The challenge is to freeze the action of your children playing.

It’s up to you what activity you want to photograph, but make it something that involves a decent level of movement.  This is a great challenge to try at the park where you can have a go at freezing the action as your child explores all the different play areas.


All you have to do is put your camera on shutter priority mode and set it to a nice, fast shutter speed.

The exact shutter speed you use will depend on the light conditions you’re taking photos in, but somewhere around 1/250 to 1/500 will  be good.  When you use shutter priority mode the camera will select the other settings for you, so your photos should be nicely exposed without you needing to do anything else.


Then let your child run and play as you snap away.

You’ll need to be careful with your focus as your child moves around, and it’s up to you if you want to set your camera to auto focus or if you prefer to select a focus point yourself.  Don’t worry if a fair few of your photos aren’t in focus, that’s the beauty of digital photography, you can take a whole series of pictures and choose the best ones to keep at the end.

If you do head to the park for this challenge, here are some ideas for moments you can try and capture:

  • Climbing up the steps or rope ladder up to a slide
  • Coming back down the slide
  • Laughing as they go back and forth on the swings
  • Simply running from one end of the play park to the other
  • Swinging on the monkey bars
  • Sliding down the fireman’s pole


You can, of course, try out this challenge anywhere you want. 

If you’re out for a walk you can try photographing them running towards you, or jumping in autumn puddles.

And if you live somewhere near the water you can get some great action shots of them throwing pebbles into the water, like this one I took of Nerys in our local woods a few years ago.


Have a think about the things your child likes to do that involves movement and action, and then give this challenge a go and see if you can freeze the moment with a fast shutter speed.

Don’t worry about the photos being perfect, just have fun getting to grips with adjusting your shutter speed and understanding how a fast shutter speed lets you capture so much detail of that one moment in time.

Just like with the 5 minute aperture challenge, there are no right or wrong ways to do this.

If you try a shutter speed of 1/250 and you’re still getting motion blur in your photos, then gradually increase the shutter speed until you find you’re getting the nice, crisp, frozen-in-time moments you’re after.

Above all though, have fun with it!

How to photograph your family and life - All about shutter speed

How to photograph your family and your life – All about shutter speed

If you’re looking to learn a bit about photography, to be able to take photos of your family that you’re proud of, and finally get your camera off auto mode, then you’re in the right place.

This post is part of a series that will give you the basics you need to feel more comfortable with your camera.  The series will give you the information in a way that’s (hopefully!) easy to understand, as well as suggesting ideas to try out to put your new skills into practice as you go.

Each post in the series will focus on a different aspect of photography, so you can get to grips with one thing before moving on to the next.

This time the focus is on shutter speed.


In a previous post in this series I explained about aperture, and how we can use it to control how much light enters the camera.

The other setting we can use to control this is shutter speed.

Shutter speed is, basically, the speed at which the camera’s shutter opens and closes again.

In photography shutter speeds are measured in seconds/fractions of seconds.  Each camera is different, but shutter speeds often range from a slowest possible speed of 30 seconds to a fastest possible speed of 1/4000.


A faster shutter speed means the shutter opens and closes really quickly, and this means less light gets into the camera.

On a bright, sunny day you’ll most likely want to use a fast shutter speed to stop your photos being overexposed.

A fast shutter speed also lets you freeze movement, which is so useful when you’re trying to photograph life with children who never sit still.

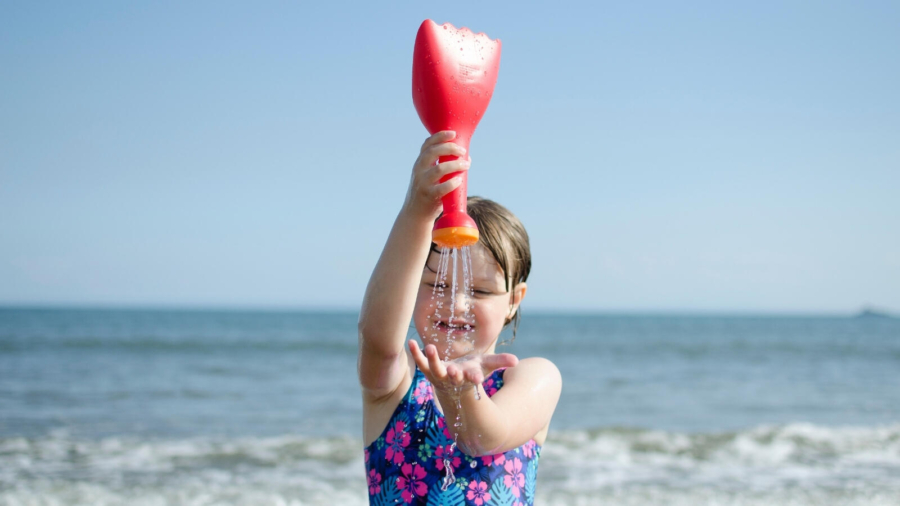
This photo of Nerys on the beach was taken with a fast shutter speed.  This meant the photo was nicely exposed and not blown out, even though it was a really bright, sunny day at the beach.

Using a fast shutter speed also froze the action of the water pouring out of the spade.  You can see lots of individual drops of water, rather than them all blurring together.


On the flip side of this, a slow shutter speed means the shutter opens and then closes again slowly, so much more light is let in to the camera.

This can be useful if you’re taking photos in low light conditions and don’t want your pictures to be really underexposed.

The main issue with using a slow shutter speed is that it’s really hard to hold a camera steady for anything more than a fraction of a second.  So the slower the shutter speed you use, the more likely you are to need to use a tripod to keep the camera still to avoid shaky images.

Where a fast shutter speed lets you freeze movement in your photos, a slower shutter speed lets you capture really lovely motion blur.

This can create some really beautiful, creative images of things like waves coming in at the beach, or water flowing down a river.

This photo used a slow shutter speed and you can see how the water moving over the rocks is really soft, and almost misty.


How to adjust shutter speed

So now you know a bit about what shutter speed is, you need to know how to adjust it on your camera.

The controls can look slightly different depending on what camera you have, so it’s worth digging out your manual for this.

You might need to go into a digital menu setting, or there might be a dial on the top of your camera that lets you select different settings.

On my Nikon there’s a dial that looks like this:


If I want to be able to adjust the shutter speed then I would select either manual mode or shutter priority mode.

When you’re just getting started it’s best to go for shutter priority mode.

With this setting you can just adjust the shutter speed and the camera will automatically select the other settings for you to create the right exposure for the light conditions.

Once you’ve put the camera into shutter priority mode you can change the shutter speed by moving the dial on your camera.  This dial will normally be on the top or the back of your camera, but again if you’re not sure which dial to use take a look in your manual to find out.

When you’re ready to take a picture, decide what you want the image to look like.

If you want to freeze the action of your toddler running around, then set the camera to a fast shutter speed like 1/250.  Or if you want to take a creative photo of the water rushing into the moat around a sandcastle they’ve built at the beach, then choose a slower shutter speed like 1/30.


So, now it’s time to start putting things into practice.

Here are some ideas for things to try with your camera on shutter priority mode to help get to grips with how it works and the different effects you can achieve by adjusting your shutter speed.


Take your camera to the park

If your children are under the age of about 11, you probably spend a fair bit of time at the park with them.  And this is a great place to practice taking photos with fast shutter speeds, because there’s so much movement and action to have fun freezing in time.

With your camera on shutter priority mode set a nice, fast shutter speed of around 1/250 and then follow your child around as they play.

It can take a fair bit of practice to get the focus right, but keep at it and you can get some beautiful shots of them on the slides, see-saws and swings.

Get out the bubbles

If you don’t want to venture beyond your front door to practice, then let your child loose with some bubbles in the garden and have a play around photographing the action.

You can get so many different images just in the space of a few minutes with a bottle of bubbles, and it’s such a classic childhood activity to capture.

If you select a fast shutter speed you’ll be able to freeze the movement of the bubbles as they float through the air.

Depending on where you focus your camera the bubbles can be the main feature of the photo or a layer of interest around your child.

You could then also have a play around with slower shutter speeds, and see what creative effects you can produce with the bubbles.


Hopefully this post has given you a great start in understanding shutter speed and how you can play with it to freeze the action of your busy family life or to show movement by including some motion blur in your photos.


If you have any questions please do leave me a comment and I’ll try my best to help!

wide aperture challenge

5 minute photography challenge – shoot wide open

Whether you’re just starting to learn about photography or have been snapping away for years and want something to get your creativity flowing again, this fun 5 minute photography challenge is for you.

If you’re just beginning and want to put what you’re learning about aperture into practice, then this quick challenge will help you really understand the effect shooting with a wide aperture can have on your photos.

And if you’re familiar with all the technicalities then this little challenge will hopefully get you looking around you with fresh eyes and feeling inspired again.

So, here’s the challenge. 

Grab your camera and shoot wide open.


If you’re new to photography and aren’t sure what that means, it’s basically opening up your lens’ aperture as wide as it’ll go.

So if you have a kit lens on your camera it might be f/3.5, and if you have a prime lens it might be closer to f/1.8.

If you’re serious about improving your photography you might want to think about getting a prime lens if you don’t already have one.  The ‘nifty fifty’ 50mm lens is a great place to start, it was the first prime lens I bought and I still love it now.

Whatever lens you have, set the aperture to its widest setting, which will be the smallest f number available.  Remember, the smaller the f number, the wider the aperture.

And a wider aperture means more light gets into the camera, and the depth of field in the image will be smaller.  So only the main subject of the image will be in focus and the rest of image is soft and blurred.


Now here’s the challenge.

Set your camera to the widest aperture possible, either using aperture priority mode or manual mode if you’re comfortable with adjusting all the different settings.

Then find something or someone to photograph and see if you can take 5 different photos of them in 5 minutes.

When you’re keeping the aperture wide open you’ll need to pay close attention to where your focus point is, and changing that each time, along with changing your position and distance from your subject, will help you create the different images.

So lets say you choose to photograph your baby.

Here are some photos you could take in the 5 minutes:

  • Front-on close up of their face, focused on their eyes
  • Close up detail shot of their little fingers holding on to something
  • The same shot of fingers holding on to something, but from further away and at a slightly different angle
  • Shot from above as they sit, focused on their eyelashes or the swirl of hair on the top of their head
  • Slightly off-centre head and shoulders image, focused on the eye closest to the camera
  • Detail shot of a part of their clothing, like a fun bit of embroidery


The challenge is all about finding ways to create different images of the same subject, using the same wide aperture.

You’ll need to get creative and think about finding different features to focus on, changing your distance from the subject and moving around and shooting from different angles and perspectives.

There are no right or wrong ways to do this.  If something doesn’t work, then move on and try a slightly different angle or focal point.

Above all though, have fun with it!