simple framed rainbow coloured flower pictures

2 quick and easy rainbow coloured flower crafts #BostikBloggers

The seasons seem to be a bit confused so far this year, but there are signs that Spring will be here soon and I really can’t wait to see the world come into bloom again.

While we wait for the flowers to start appearing outside I’ve made a couple of rainbow-coloured flower crafts to brighten things up inside.

2 quick easy rainbow coloured flower crafts


Simple rainbow flower picture


What you’ll need:

  • Plain white card
  • A picture frame
  • Flowers made from coloured cardboard, one of each colour of the rainbow
  • A green pen
  • Scissors
  • Glue dots (or glue)

rainbow flower craft what you need


First of all you need to cut the piece of card to the right size to fit your frame.

Then get your flowers ready.

I used pre-cut flower shapes, but you could make your own using coloured card and a flower shaped punch.  You could even cut some out yourself just using scissors, although it might be a bit fiddly doing it this way.

simple fun flower picture craft rainbow colours


Arrange the flowers in a line across the piece of cardboard, in the same order as the colours of the rainbow.

You could put them in a nice level line if you like order, or you can off-set them a bit like I have.  Once you’re happy with how they’re arranged, stick the flowers down with glue dots or glue.

Then draw in the flower stems with the green pen.

simple fun rainbow coloured flower picture craft


Then all that’s left to do it put the picture in the frame and find somewhere in the house to display it!

simple framed flower picture rainbow colours

simple fun framed flower picture rainbow colours


Easy 3D rainbow flower picture


What you’ll need:

  • White card
  • Cardboard flowers in the different colours of the rainbow
  • Photo frame
  • Glue dots or glue

simple fun framed 3d rainbow coloured flower picture what you need


If you’re using a normal picture frame then take the glass out and put it somewhere safe, or throw it out (responsibly).  If you’d rather you can just get a box frame for the project.

Next, cut your piece of white card to the right size to fit in the frame.

Then gather together your flower shaped pieces of card in rainbow colours.  Like I did with the first picture, for this project I used pre-cut flower shapes, but you can make your own from coloured paper if you prefer.

Once you have all your flowers, start bending the petals in towards the middle to give a 3D look to them.

simple fun 3d flower picture


Once you’ve prepared all the flowers start arranging them on your piece of card.

I stuck with the rainbow theme by placing them across the card in order of the colours of the rainbow – red, orange, yellow, green, blue, purple.  When you’re happy with the placement of the flowers, start sticking them down using glue dots or glue.

bright easy 3d flower picture


Pop the finished picture in your glass-free frame, and you’re done!

simple fun framed 3d rainbow coloured flower picture

simple fun framed 3d flower picture rainbow colours

So there you have it, 2 lovely, bright and colourful flower pictures than you can make to bring a bit of Spring into your home!

If you’re in the mood for even more flower themed crafting, then take a look at this flower photo frame that Nerys and I made last year.  It’s just as easy to do as these pictures, and the result is perfect for a child’s bedroom.

Disclaimer: I was sent a box of craft materials to create this post for my role as a Bostik Blogger, but all words, opinions and creations are my own.
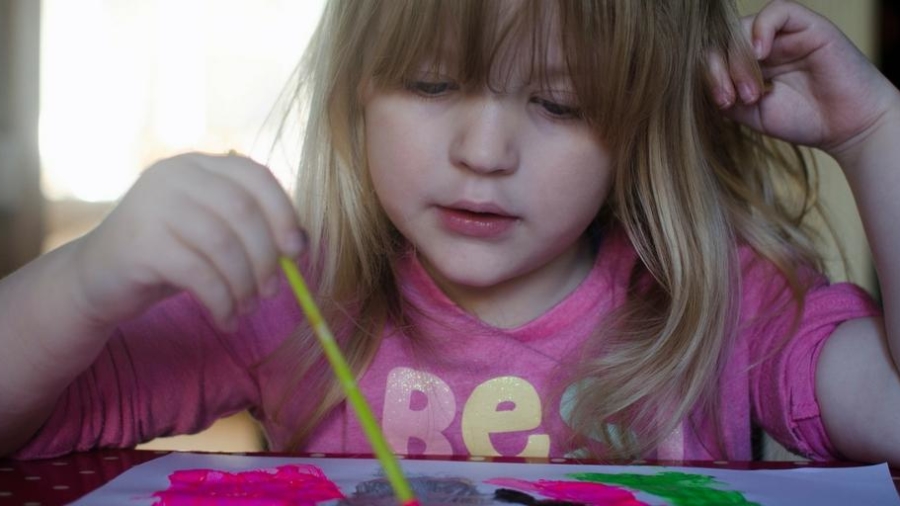
young girl painting

Developing child creativity with arts and crafts activities

Reading and mathematics are two “major” subjects in most schools, but what about creativity? Although arts and crafts are considered a luxury, they can also be the building blocks of child development.

Learning to be creative and appreciating beauty is ever more significant for next generation kids.

Here are 5 benefits of developing your child’s creativity:

Developing child creativity with arts and crafts activities

  1. Fine motor coordination. Children need motor coordination to learn how to write, cut patterns, and draw shapes. These skills also help them in other areas of their life, such as eating and dressing.


  1. Self-esteem booster. At first, rather than choosing difficult art projects, select the ones that match with your child’s current skill level. This will help them build their self-esteem, and give them a great sense of accomplishment, especially when they complete their crafts successfully. Later, as your children begin to explore more, you can introduce more challenges just to keep them engaged.


  1. Bilateral coordination. Crafts activities such as drawing, coloring, and cutting require your child to use both their hands. This skill can also help them in other areas of their life, including typing, tying shoes, writing, and much more!


  1. Self-regulation. Your child needs to learn to “wait” when doing crafts activity such as drying, which can help them develop life’s vital skills such as patience and self-control.


Remember: Arts and crafts must also teach your child to be flexible.


When exploring creativity, there’s no right or wrong way – just a matter of achieving a balance.


  1. Bonding and fun. You and your children will spend quality time together to create something memorable and fun, which you’ll both look at it with a sense of pride and joy.


And, here’s how you can inspire creativity in your child, in 6 simple ways:


  1. Avoid drawing with your kid. Parent often sit beside their children and draw along with them, which can discourage him. Instead of drawing with them, just stand there right next to them and let them know that you’re interested and supportive of their artwork.


  1. Don’t give directions. Don’t tell your children what they should draw or how they should draw. For example, rather than saying, “draw an elephant,” encourage them by saying, “play around with the colors using different types of paper and brushes.”


  1. Be specific about their artwork. When giving feedbacks on artworks, try being specific, rather than vague. For example, you can say, “I see that you’re using a lot of oranges. Why did you select that color?”


  1. Prepare an art space. Establish an art space for your child so that they can experiment with their artwork (and be messy). It could be outside the house, in the backyard, garage, or inside the home (top of your kitchen table – my favorite).


  1. Let it be. Once they’ve completed their artwork, do NOT suggest additional changes, which will help them feel appreciated, and know that what he’s created is enough – even if it was merely a dot on the paper.


  1. Explore their process. One of the most effective ways to boost conversation about your child’s artwork is asking them, “Did you enjoy making it?” or, “Go on, tell me how did you do it?”


And, here are 3 easy to follow craft ideas you can do with your kids:


Idea #1: Cotton Ball Snowman


  • Make three circles to outline your snowman.
  • Pour glue into each circle completely
  • Stick cotton balls in those circles to make your snowman
  • Be creative and make a face for your snowman and accessorize with gloves, goggles, hat, etc.


Idea #2: Snowflakes


  • Trace a circle on a paper
  • Cut the circle
  • Fold the circle in half, 3 times
  • From the edges, draw shapes using a pencil
  • Cut along the designs using scissors
  • Open your circle slowly


Idea #3: Holiday Inspired Cards


  • Cut a piece of construction paper into a rectangular shape (10 inches by 6 inches, for example).
  • Write your message on the paper and make your child trace over it.
  • Using gum, stick a picture of your child.
  • Include holiday inspired stencils, then, ask your child to trace on the card.
  • Use a lot of different materials: paint, markers, glitter, colored glue, magazines, scrap paper, buttons, etc.


As you can imagine, all little ones love sticking their things – from cards to snowflakes – on their walls and ceilings. And, they’ll also absolutely adore you if you can add their names to labels.


Here’s the good news: you can personalise their creations quickly and easily by using sewing labels or personalised stickers (https://wunderlabel.co.uk/woven-labels/bespoke-with-own-logo ).


Disclaimer: this is a collaborative post

bostik bloggers simple butterfly painting

Fun and easy butterfly painting #BostikBloggers

The theme for this month’s Bostik Bloggers craft activity is ‘flying’, and I love it because there were so many possible crafts we could have done.  Around this time last year I made a fun springtime bird craft so I wanted to do something a bit different this time round.

After deliberating for a while I took inspiration from a craft activity that Nerys and I have done a few times together in the past and have always enjoyed.

Butterfly paintings! 

I can’t for the life of me think of what this activity is actually called, some people call it squish painting, or blob painting, and others call it symmetry painting.  I’m keeping it simple and just going with butterfly painting.

Fun and easy butterfly painting

What you need:

  • Paper or card
  • A pencil
  • Scissors
  • Paint in a variety of colours
  • Glitter glue for some sparkle
  • Googly eyes

simple butterfly painting what you need

What you do:

1. Get your piece of paper and fold it in half.  Draw one half of a butterfly shape on the folded paper and cut it out.  Then open up the paper to reveal your butterfly.  I tend to go for a really simple butterfly shape but you could always go for something a bit more elaborate/realistic!

simple butterfly painting bostik bloggers

2. Get splodging with the paint and glitter glue, but only on one half of the butterfly.  You want to put a decent amount of paint on each time, so that it will spread easily onto the other half of the butterfly when you fold it over.

Some people like to water down the paint they’re using slightly, to really get the colours to spread around, but I kept mine as they were.

simple butterfly painting craft bostik bloggers

3. When you’re happy that you’ve got enough paint and glitter glue down, carefully fold the butterfly in half along the crease and press down to print the paint onto the other half of the picture.  Then slowly open the butterfly up and see how pretty it looks!

bostik bloggers simple butterfly painting craft

7.  Let the butterfly dry and then add some google eyes if you want.

bostik bloggers simple butterfly eyes painting craft

Nerys and I went for bright primary colours for our butterfly this time but you can choose whatever colours you want for yours.  You could make a really pretty butterfly with pastel colours, or even go for a rainbow theme.

This is a really fun craft to do with children of all ages, and can be a great way to introduce the idea of symmetry to little ones.

Have you had a go at doing this with your children?  Do you remember doing it yourself when you were little?!


Disclaimer: I was sent a box of craft materials to create this post, but all words, opinions and creations are my own.

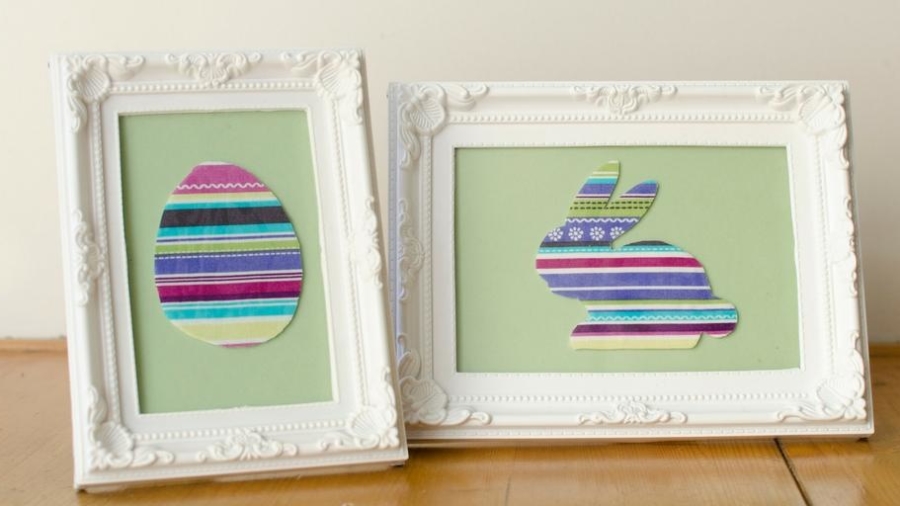
simple framed easter decorations craft activity

Simple framed Easter decorations #BostikBloggers

The theme for this month’s Bostik Bloggers craft activity is Easter, and the box that arrived in the post was full of lovely colourful bits and pieces for me to get creative with.

I really loved making the Valentine’s wreath last month, and it’s been lovely having it hanging up in the hallway.  So I decided to go with another craft activity that I could display at home to brighten things up a bit.

After digging through the box of crafting supplies I came up with the idea of making some colourful Easter themed pictures that I could frame and either hang in the hallway or put up on the mantelpiece in the lounge.

If you fancy getting creative and making some Easter decorations for your home, then take a look at my simple framed pictures.

Simple framed Easter decorations

Here’s what you need:

  • Frames
  • Coloured card
  • Patterned fabric or paper
  • Easter themed foam shapes
  • Scissors
  • Glue

Simple framed Easter decorations what you need


The first thing you need to do is cut your coloured card to the right size to fit in your frames.

I generally find the easiest way to do this is to take the glass out of the frame and then draw around it onto the card.

how to make simple easter frames

Next get your Easter themed foam shapes (I used a bunny and an egg) and stick them on to the back of the patterned fabric or paper.

If you don’t have foam shapes you can always draw some Easter shapes onto some cardboard and use that instead.  You just want something thicker than paper ideally, so that it stands out a bit when you stick it to your coloured card.

how to make simple easter framed decorations


Once the glue has dried, trim the excess fabric/paper from around your foam shapes.

how to make simple easter shapes framed decorations


Glue the shapes on to the middle of your pieces of coloured card.

You can just normal glue, or do what I did and use glue dots which are just so quick and simple for these kinds of crafts.

If you really want your shapes to stand out from the background you could use sticky foam pads instead.

how to make simple easter shapes framed decorations 2


Then it’s just a case of popping your finished picture into the frame.

Cute and simple framed easter pictures

What I really love about this craft is that there are some many different looks you could create depending on what shape you pick and the colours and patterns that you choose.

What Easter shape would you pick if you made one of these?


I was sent a box of craft materials to create this post, but all words, opinions and creations are my own.


Mummies Waiting
valentines wreath

Fun and easy Valentine’s day wreath #BostikBloggers

I am thrilled to say that I’m going to be a Bostik Blogger again this year!

I had such good fun last year putting together a craft activity each month and am really looking forward to getting creative again this year.

Each month we have a different theme to build a craft activity around, and the first theme of 2018 is Valentine’s day.

Now I’ll be honest here and admit that my husband and I have never really ‘done’ Valentine’s day.  I think we maybe exchanged cards the first year we were dating but since then the day sort of passes us by each year.

This year though, I’m focusing on joy, and so I feel much more like celebrating any and every special occasion going.

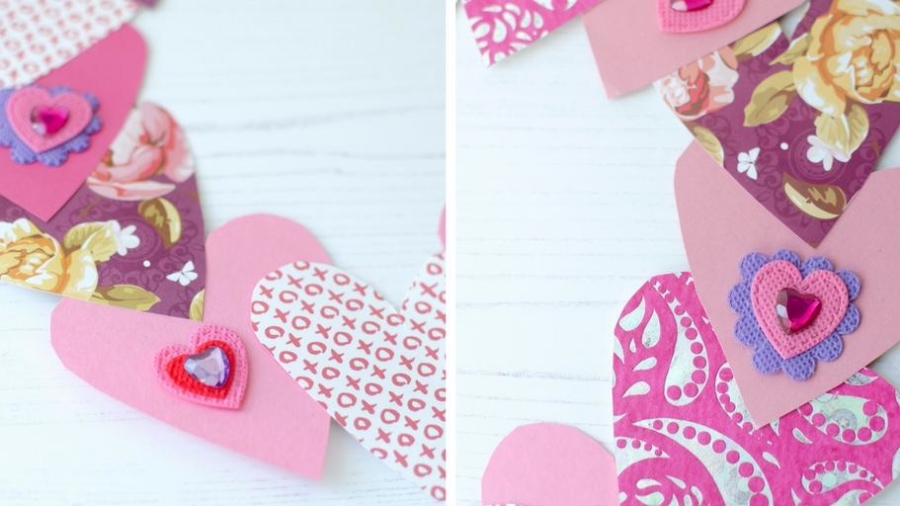
So the craft activity I’ve chosen for this month is a Valentine’s wreath to hang up at home and help get us all into the spirit of things.

valentines day wreath craft activity with paper hearts

What you’ll need

  • A piece of cardboard
  • Something round to draw around
  • Pieces of patterned/coloured paper
  • Scissors
  • Glue/glue dots
  • Optional – love-themed stickers and embellishments

valentines day wreath what you need

What you do

Find two circular items to draw around on your piece of cardboard, to make the base for your wreath.  I used mixing bowls for mine.  Or if you still have your old maths kit at home you can use a compass to draw 2 circles, one inside the other.

Then cut out the wreath base.

valentines day wreath cardboard circle base

Next draw a heart shape onto the spare bits of cardboard to use as a template.

valentines day wreath cardboard heart template

Draw around your heart template on the different pieces of coloured and patterned paper.  You can place the template onto your wreath base and move it around to work out roughly how many paper hearts you’ll need.

Cut out all your paper hearts.

valentines day wreath paper hearts

Using glue or glue dots, stick the paper hearts around your wreath base.  I kept all my hearts facing up the same way and just worked my way round the wreath from bottom to top sticking them down.  But have a play around with your hearts and see what you like best.

valentines day wreath craft paper hearts

Fill in any gaps or bits that look a little too plain for your liking with love-themed stickers or embellishments.

If you really want to go to town with your wreath you can get out the glue and glitter, or just keep it plain and simple if you’d rather.  That’s what I love about these kinds of crafts, you can so easily adapt them to suit your personal tastes.

valentines day wreath craft paper hearts stickers

Stick a loop of ribbon onto the back of the wreath so you can hang it up.  I used a small piece of tape to stick my ribbon on, but you could always use a stapler if you need to.

Or you could skip the ribbon completely and just use some blu-tak to stick your wreath up.

valentines day wreath hanging ribbon

And there you have it, a pretty Valentine’s themed wreath!

I’ll be hanging ours up in our hallway so we all feel the love as soon as we walk through the front door every day!

craft activity valentines day wreath

Do you ever put up any decorations as part of the Valentine’s day celebrations?

If you’re more like me and don’t tend to make a big fuss on the day, these lovely ideas for romantic valentine’s day dates at home might give you some inspiration for showing your partner how much you care without having to book a table at an expensive restaurant!

I was sent a box of craft materials to create this post, but all words, opinions and creations are my own.

chinese new year bead threading dragon bostik blogger

Dragon bead threading craft for Chinese New Year #BostikBlogger

How on earth have we almost come to the end of the year?!

I know it’s almost a cliche to say it at this point, but seriously, where have the last few weeks gone?

Christmas is just around the corner, and hot on its heels will be the New Year.  And then not long after that the festivities will start again for Chinese New Year, which is the theme for this month’s Bostik Blogger craft activity.

I decided to create a Chinese dragon bead threading activity, perfect for keeping little ones occupied during the celebrations.

Dragon bead threading craft for Chinese New Year

This is a super simple activity, and you only really need a couple of things to do it:

  • pipe cleaners
  • a selection of beads

I also used a pen and some googly eyes for the dragon’s face, but you can just draw all the features on with a pen if that’s all you have handy.

beads and pipe cleaners to make a dragon for chinese new year

Here’s what you do.

Grab a pipe cleaner and some beads and start threading.

Ideally use a red, orange or yellow pipe cleaner – I’ll explain why later!

When you’re threading the beads on you can create a bit of a pattern, or just put the beads on randomly, it’s completely up to you.  I went for a vaguely rainbow-like pattern with mine, because the beads I had were such a mix of colours.

bostik bloggers chinese new year bead threading

This is a really great activity for young children, as it helps develop their fine motor skills.

It’s also fun for older children though, who will enjoy picking out the beads they want to use and making their dragons as colourful as they possibly can!

When you thread the beads on make sure you leave a bit of the pipe cleaner free at each end.  Twist one of the ends to keep the beads from sliding off, and leave the other end free so that it looks like the dragon is breathing fire, if you do manage to find a red, orange or yellow pipe cleaner to use!

chinese new year dragon bead threading activity

Then, using a pen and some googly eyes (if you have some), add the dragon’s facial features to the end bead.

I kept my dragon quite plain and simple, but if you want to you can get creative and doodle patterns and scales and things on the rest of the beads to make your creation look even more dragon-like.

chinese new year dragon bead threading activity

And that’s it!

If you want to use this as a fine motor skill activity then you can just pull all the beads of and start again.  You could also make this more of an educational activity by making a few pattern cards and getting your child to follow them to make different dragons each time.

Or you can just make one and then have fun playing with it, making it fly through the air!


If you’re still feeling in the mood for crafting then you could have a go at making this brilliant paper Chinese dragon from Suburban Mum.


I was sent a box of craft materials to create this post, but all words, opinions and creations are my own.

vision direct christmas craft

Christmas crafting with Vision Direct

We love getting crafty in our house.  
There’s a big cardboard box stashed under a table in the lounge that is almost overflowing now with art and craft supplies, and the children love pulling it out and getting creative, making whatever they fancy from the contents.

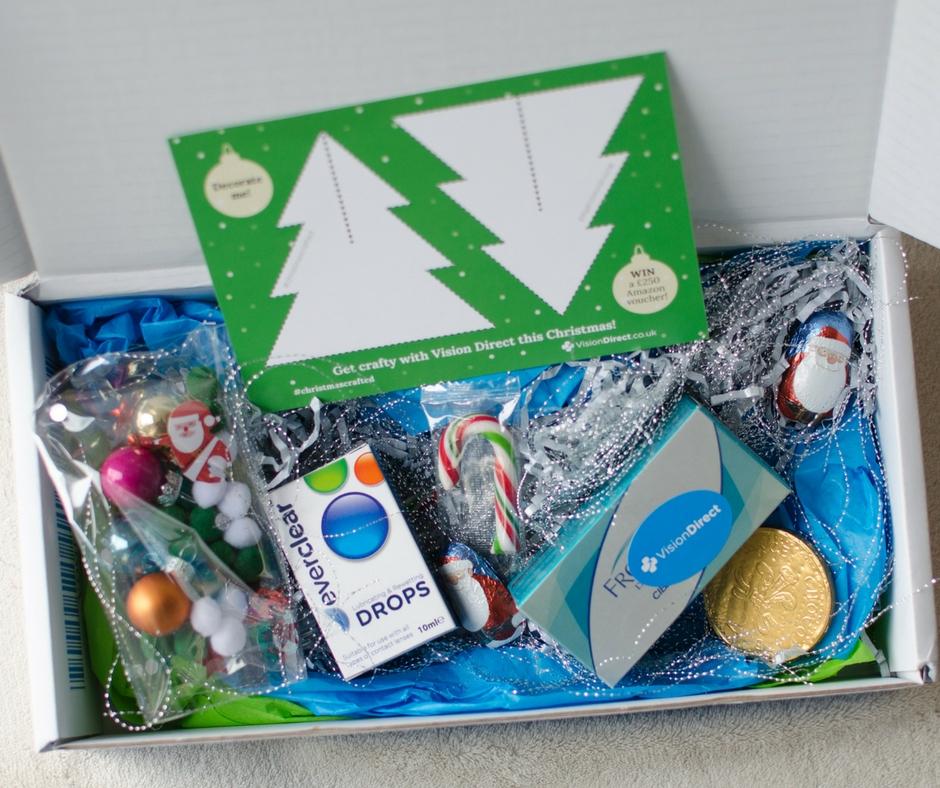
So we were all rather excited when this box arrived from Vision Direct with new supplies to get creative with for Christmas!

vision direct christmas craft competition

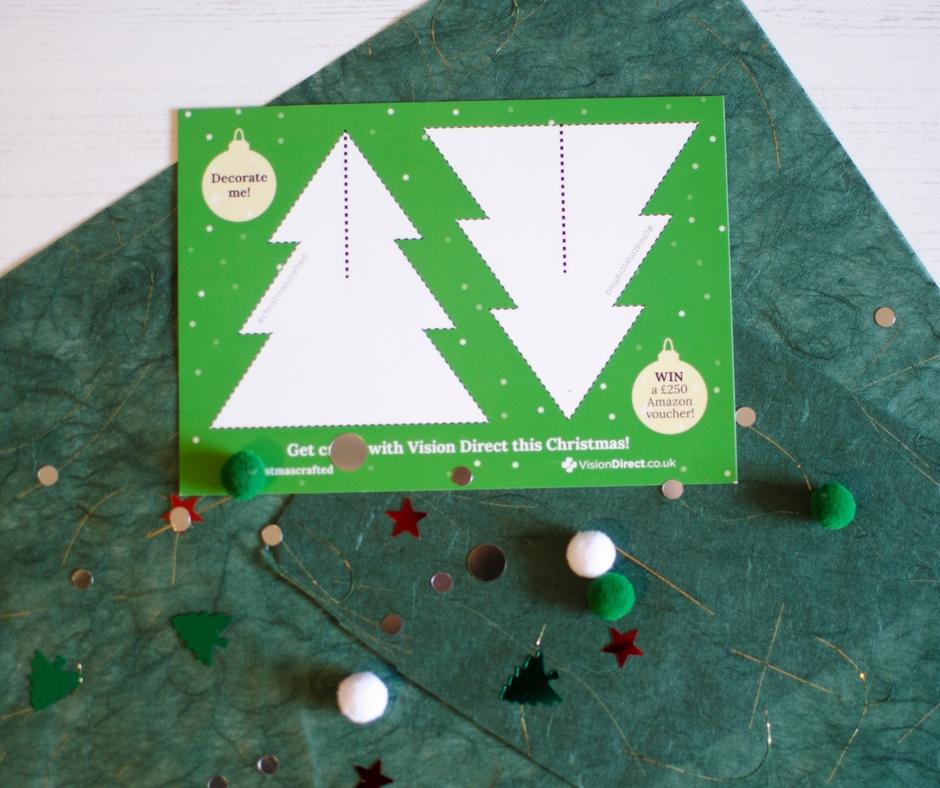
Vision Direct have got a really fun competition running at the moment, where you can get crafty turning old boxes into Christmas trees for a chance to win £250 in Amazon vouchers.

They sent us this little box of crafty bits and pieces so that we could have a go and see how easy and fun it is to do!

vision direct christmas craft competition 2

There was a postcard in the box with templates for the Christmas tree, but you can also download templates in a few different sizes from the Vision Direct website.

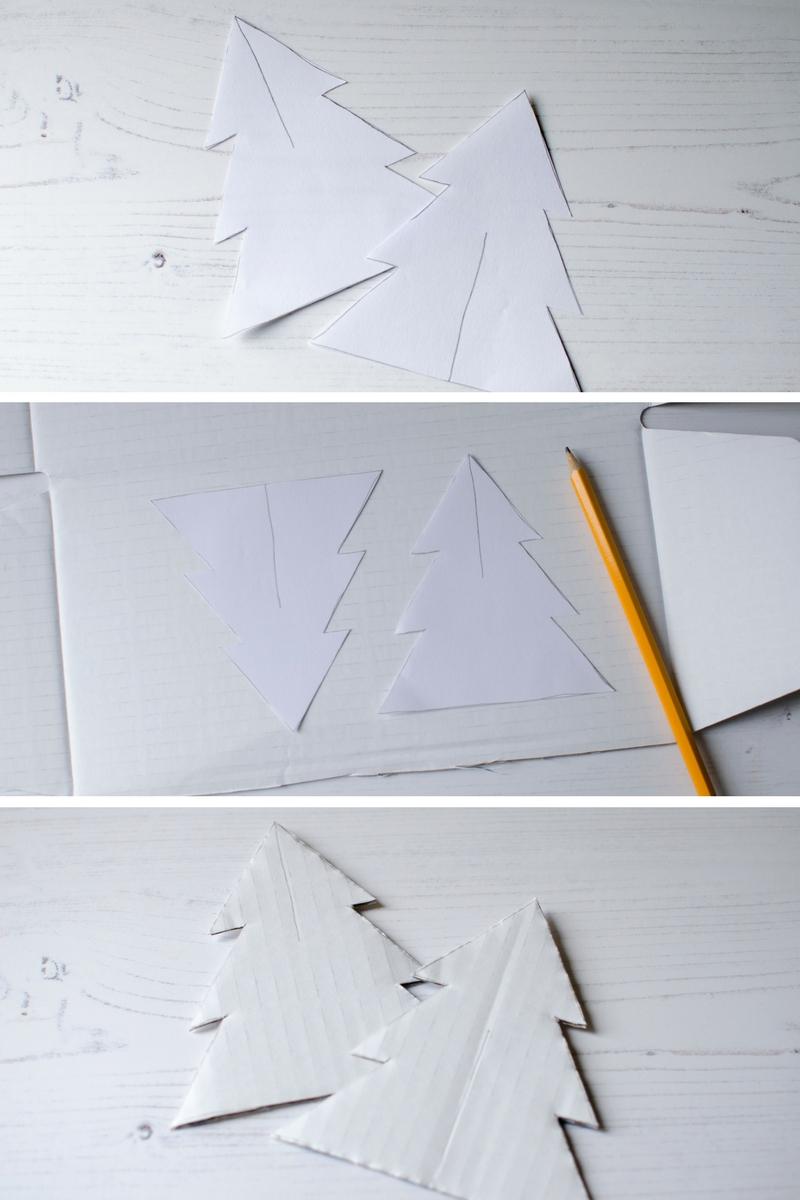
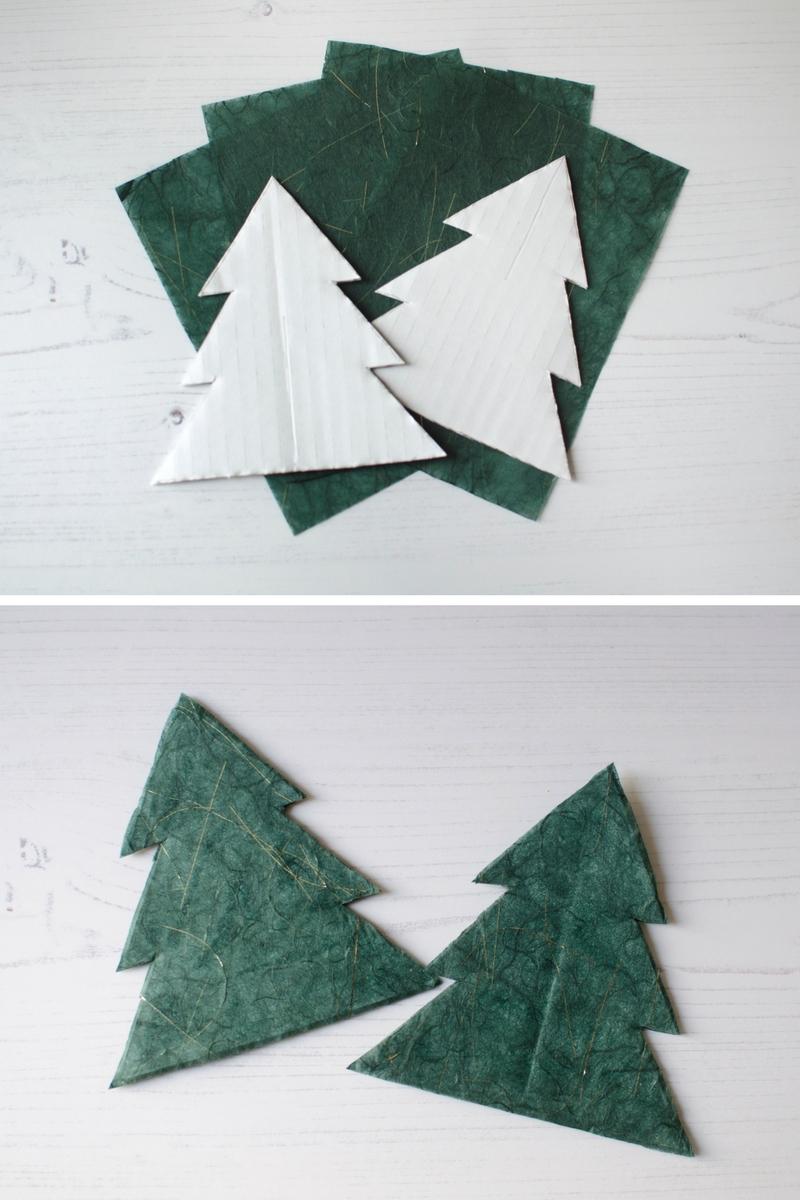
I didn’t want to cut up my postcard (in case I wanted to photograph it again – blogger problems!) so I traced the templates on to a piece of paper and then cut them out.  Then I flattened the box a bit and drew round the templates on part of it, then cut the tree shapes out.

vision direct christmas craft 3

Then the fun part started!

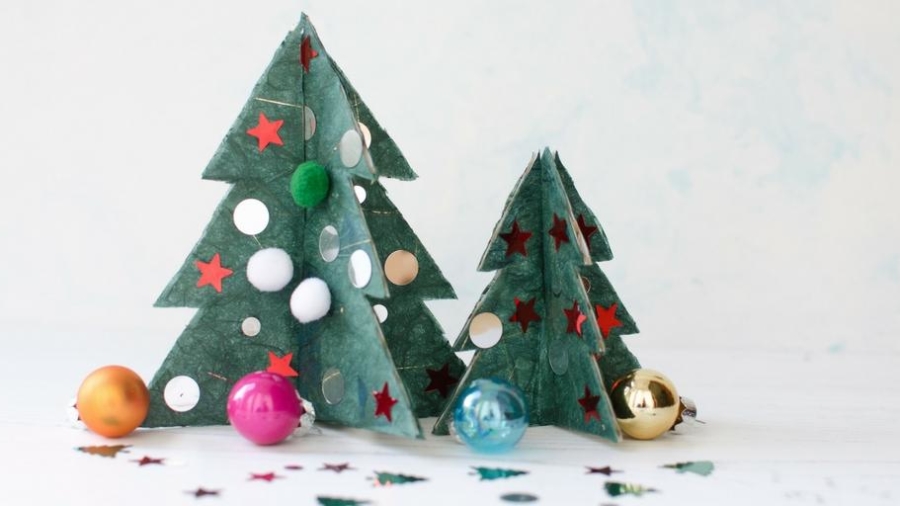
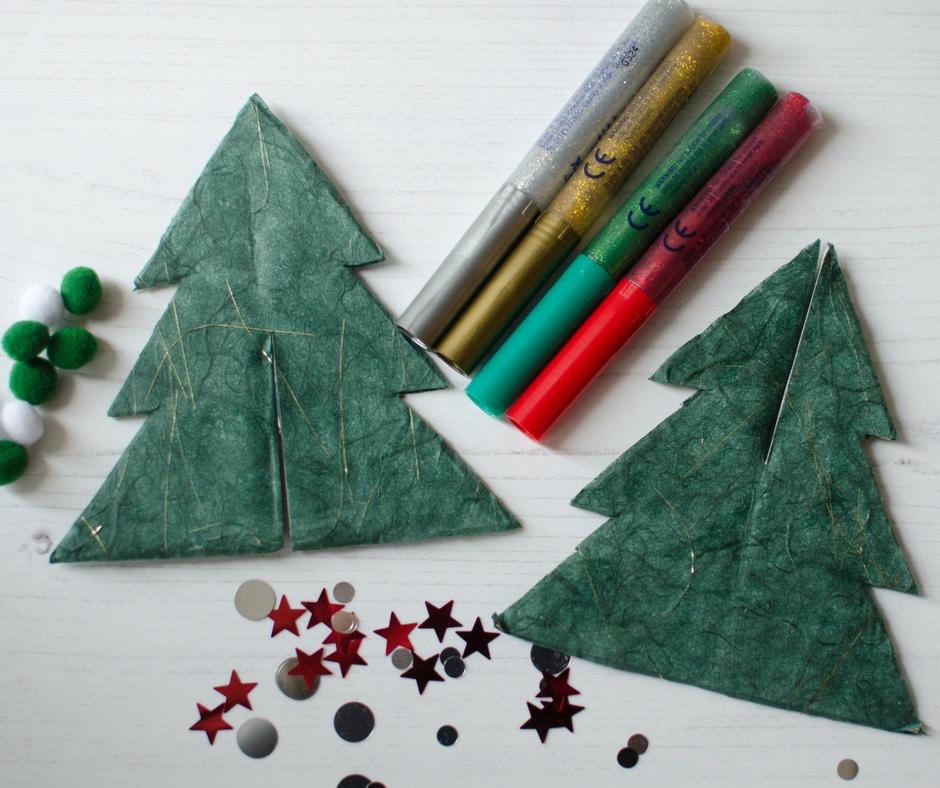
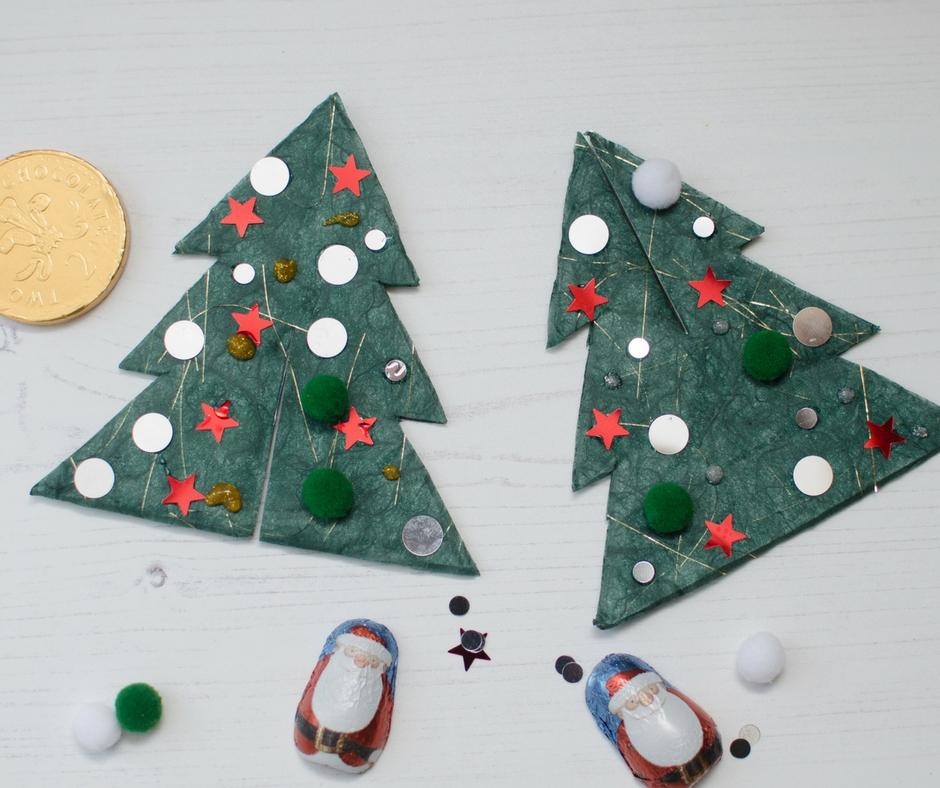
I found the perfect green mulberry paper in my craft stash, that was just the right shade of green and even had strands of gold running through it.  I covered the tree shapes in glue and stuck the paper to each side, then trimmed around the edges and left them to dry.

vision direct christmas craft 4

Once the glue was properly dry we gathered the materials we wanted to use to decorate the trees.

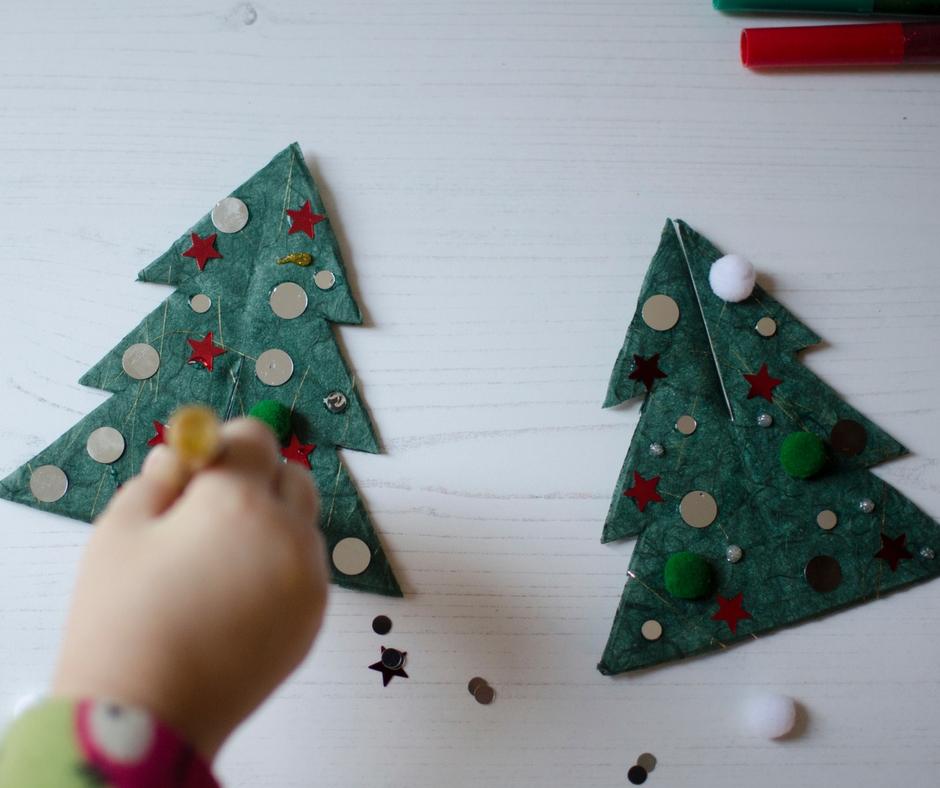
Nerys and I decided to keep our trees quite simple, and just used some glitter glue, little pom poms and shiny Christmas confetti pieces.

vision direct christmas craft 4 (2)

I thought it might be a little bit fiddly for Nerys at times, but she actually did really well sticking the little pieces on to the trees.

If you’re making a tree yourself to enter in the competition, then you can get as creative as you like at this stage.  

You can keep your tree on the minimalist side like we did, or you can go all out and cover it in glitter and sparkles and stickers and all sorts!

vision direct christmas craft 6

The hardest part of making these with Nerys was keeping her distracted while the two halves were drying, because she was just desperate to put them together and see the finished tree!

Luckily the kind people at Vision Direct had slipped a few chocolate treats in the box with the craft supplies, so I made use of those to keep Nerys happy.

vision direct christmas craft 7

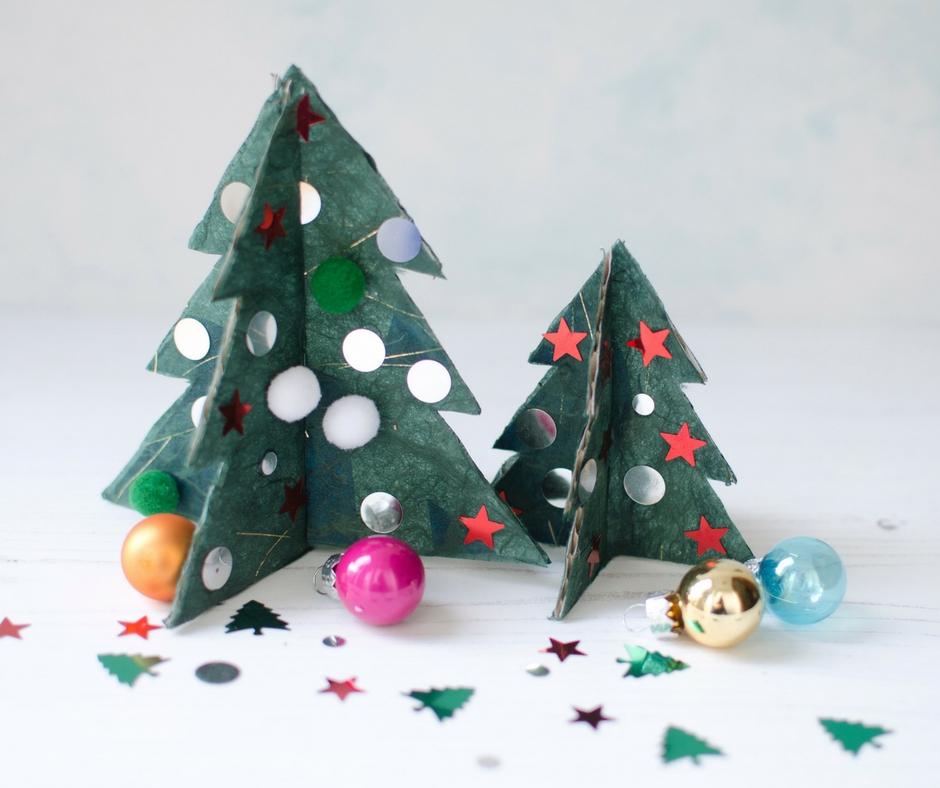
The final stage of making our Christmas creations was slotting the two halves of the trees together.

This was nice and easy to do thanks to the lines marked on the templates.  And here are our end results.  Not too shabby!

vision direct christmas craft 9

Our trees are now standing proudly on our mantelpiece, and they look great alongside our other decorations!

If you’re feeling inspired now and fancy having a go yourself you can head to Vision Direct and download the tree templates from there.  Once your tree is complete you just need to share a photo of it on Facebook, Twitter or Instagram using the hashtags #christmascrafted and #visiondirectuk.  

Have fun and good luck!


Disclaimer: This is a collaborative post with Vision Direct.