Bara brith recipe

Bara brith recipe

I’ve seen several posts recently where people have talked about loved ones they’ve lost and how much they cherish the few letters and notes that they have in that person’s handwriting.  There’s something about being able to hold in your hand something that they touched, that they wrote, that allows you to feel like they’re still close.

My Grandad passed away before I was born, and in the last few years I’ve lost my remaining 3 grandparents.  My husband has also lost both his nans in recent years.  And I’m finding myself getting more attached to those little things they all left behind.  The photos we have of them are, of course, so important.  But what I’m really happy to have are the scraps of paper with their handwritten recipes on.  Seeing that familiar writing brings all sorts of memories rushing back.  And there is something special about the idea of cooking a recipe that they used to make.  It feels almost like carrying on a part of them.

So when I was looking for something to make this week I turned to a little folder of family recipes that we have on our bookshelf.  And this is the one I chose.  Nana Marge’s bara brith.

Bara brith recipe

Bara brith literally means ‘speckled bread’ and is a cake/bread made with dried fruit, which explains the name!  It’s one of the things, like welsh cakes, that you always see in the shops in Wales, but that I’d never actually had before.  Steve had been on at me for ages to make it though, so I thought it was time to grab his Nan’s recipe and give it a go!

So, on with the recipe!

Ingredients:

  • 250g mixed dried fruit
  • 110g butter
  • 150g brown sugar
  • 240ml milk
  • 1/2 teaspoon bicarb
  • 340g Self raising flour
  • 2 eggs
  • 1 teaspoon mixed spice
  • 1 teaspoon cinnamon

What you do:

  1. Preheat the oven to 180 degrees.
  2. Melt the butter, sugar, milk, fruit and bicarb in a large pan.
  3. Bring to the boil and simmer for 2 minutes.
  4. Cool.
  5. Add beaten eggs and flour and mix well.
  6. Tip mixture into a greased/lined loaf tin and cook for 1 hour at 180.

A few things to note:

  • Top the cake with a sprinkle of brown sugar before you put it in the over for a nice crunchy finish!
  • Keep an eye on the cake once it’s in the oven.  If it looks like it’s starting to brown too quickly then you can cover it with some foil.
  • If you want you can soak the dried fruit for a bit (or overnight if you fancy) in a mug’s worth of black tea before making the bara brith.

I have a couple of recipes from my side of the family that I want to work my way through, so keep a look out for Granny’s chocolate cake in the future!

Do you have a treasured family recipe?  I’d love to know what it is!

Cuddle Fairy
slow cooker baked sweet potatoes

Slow cooker sweet potatoes

I was sat doing our food shopping the other night.  I do it online these days.  So much easier than negotiating the supermarket with two small children in tow!

Anyway, I was doing a mental meal plan as I was shopping, working out what we would eat that week and therefore what I needed to buy.  I thought about getting some potatoes, so I could make my slow cooker baked potatoes.  But then spotted a pack of sweet potatoes.

We both love sweet potatoes, but I tend to cut them into wedges and bake them.  I’ve not have them as replacement for baked potatoes before, but thought it had to be worth a try.  Well. what can I say, other than YUM!

slow cooker baked sweet potatoes 

So, if you fancy trying slow cooker sweet potatoes for yourself, here is the ‘recipe’.  It’s pretty much exactly the same as the method for cooking normal potatoes in the slow cooker, but in case you haven’t read that recipe here’s how you do it:

  • Get some foil or baking parchment and scrunch a few pieces into balls and put them in the slow cooker.  You want enough to cover the base.


  • Rub a bit of oil, salt and pepper into the potato skins.


  • Wrap them in foil.


  • Put them in the slow cooker, on top of the scrunched up foil/baking parchment.


  • Cook on low for about 8 hours.


  • Remove and top with whatever you fancy – I think chilli would be so tasty with these!


  • Enjoy!

There are a few things to note with these:

  • The skins won’t be at all crispy.  That’s just the way it is with slow cooking!  So if crispy skins are important to you then you might want to either stick to oven cooking them, or cook them this way then pop them in a hot oven for 5 minutes to crisp them up.


  • You really don’t need to add any water to the slow cooker.


  • We ended up making sweet potato tuna melts which were so delicious – basically you cook the potatoes as described above, cut them in half and lie them on a baking tray.  Then top with tuna mayo and cheese and pop under the grill for a few minutes until the cheese starts to melt and bubble.  So good!

Sweet potatoes not your thing?  Then check out my recipe for slow cooker jacket potatoes.

Cuddle Fairy
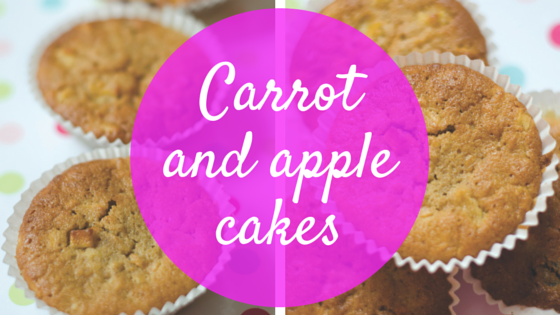
Carrot and apple cake recipe

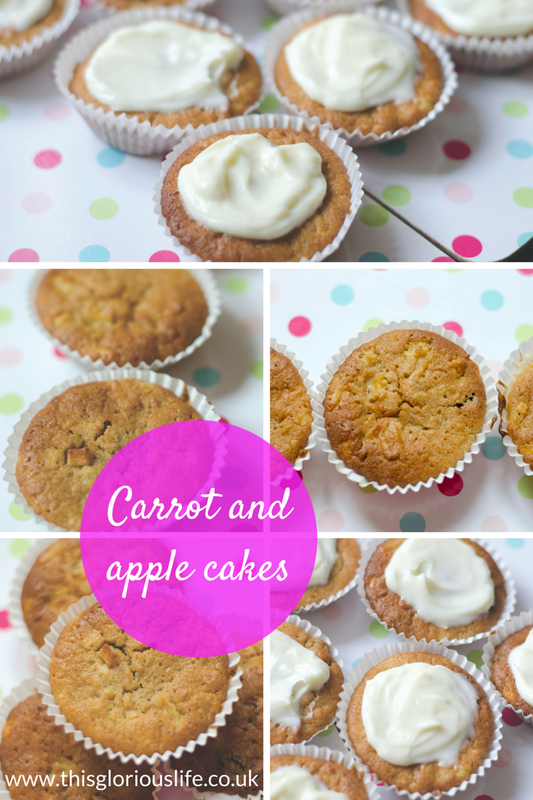
Carrot and apple cakes

I mentioned the other day that Rhys has been asking to make carrot cake a lot recently, so we’ve been experimenting with a few different recipes to find one that we really like.  And I think we’ve got a winner!

This takes a little bit of work in that you have to grate the apple and the carrot, but other than that it is a simple recipe and definitely one you can make with kids.

Carrot and apple cake recipe 

This recipe made about 15 little cakes.

What you need:

  • 150g self raising flour
  • 1 teaspoon baking powder
  • 1 teaspoon cinnamon
  • 1 teaspoon mixed spice
  • 125g softened butter
  • 125g brown sugar
  • 1 medium carrot, grated
  • I bramley apple, half grated, half chopped into tiny chunks
  • 50g raisins
  • 2 eggs

For the cream cheese icing (if you fancy it!)

  • 100g full fat or low fat cream cheese
  • 2 tbsp icing sugar

What to do:

  1. Preheat oven to 180 (gas mark 4)
  2. Put about 15 cake cases on a baking tray (or in a bun tray if you’re feeling fancy!)
  3. Sieve the flour, baking powder, cinnamon and mixed spice into a large bowl.
  4. Add the butter, brown sugar, carrot, apple, raisins and eggs. Beat together with a wooden spoon until well mixed.
  5. If the mixture seems a little too wet (sometimes you get loads of liquid from the carrot and apple), then add another tablespoon of flour..
  6. Divide the mixture between the cases and bake for 20-25 minutes until they spring back when pressed.
  7. Leave them to cool completely.
  8. They’re really tasty just as they are, but if you want to make the icing then just mix the cream cheese with the icing sugar in a bowl then spread on the cakes.
  9. Enjoy!
Carrot and apple cakes recipes 

Looking for more recipes to bake with your children?
Check these out!

Simple chocolate biscuits
Chocolate banana bread
Cuddle Fairy
Easy iced mocha recipe

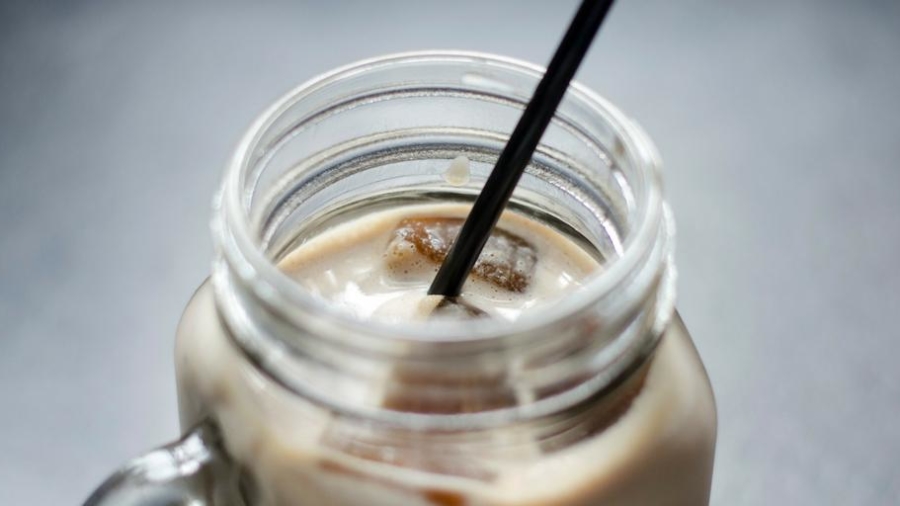
Iced mocha recipe

I may have mentioned once or twice that I like coffee.  Ok, I love coffee, I need coffee, I can’t get going in the morning without my coffee.

But in this mini heatwave that we’ve been having it just feels a bit wrong to be drinking steaming hot mugs of the stuff.  So I have an alternative.

A cool, delicious, chocolatey, alternative.  The iced mocha.

Super easy iced mocha recipe

There are various recipes floating around the internet for this, but this is the way I like to do it!  It does require a little bit of planning though.

Basically, you need to make up a nice big mug of black coffee.  Then pour it into an ice cube tray and pop the tray in the freezer.

Once you’ve done this part you’re sorted.  Cold coffee treats can be yours whenever you want!

For my mocha recipe, grab a glass, fill it about 2/3 full with milk then use whatever you’ve got to make it chocolatey – chocolate milkshake powder, cocoa powder, chocolate syrup, whatever you’ve got!

Then go get about 5 or 6 of the coffee ice cubes and pop them in your chocolate milk.

Ta da!  Done.

You can drink it straight away, or leave it a few minutes for the ice cubes to start melting a bit and mingle with your chocolate milk.

Or if you’re feeling fancy you can blend the whole thing together.  Whatever floats your boat!

Easy iced mocha recipe

Looking to shake things up a bit?  Here are a few suggestions:

  • Leave out the chocolate bit and go for straight milk with the coffee ice cubes for an iced latte


  • Add  a cheeky splash of Baileys or Kahlua


  • Top it with whipped cream


  • On a really hot day you can make a cup of cold coffee and then just add some of the coffee ice cubes to it, to really chill the drink and get an extra coffee hit!


What do you think?  Are you an iced coffee fan, or are you a hot coffee purist?!

Simple chocolate biscuit recipe

Simple chocolate biscuits

I’ve always known that I’m just like my Mum.  We’re so similar in so many ways; it can get a bit freaky at times!  But every now and then I realise that little bits of my Dad have snuck through too.  Like my slight addiction to chocolate, and needing to know that there’s a stash of it somewhere in the house!

These little biscuits are perfect to make if you need a bit of a chocolate fix but don’t have any actual chocolate bars in the house!  They’re also a great recipe to do with young children as it’s just a case of measuring ingredients, plonking them all in a bowl, mixing, dividing and cooking!

Simple chocolate biscuit recipe

Here’s what you’ll need:

  • 8oz (225b) margarine
  • 4oz (100g) caster sugar
  • 8oz (225g) self raising flour
  • 2oz cocoa powder
  • Handful of chocolate chips

And here’s what you do:

  • Mix all the ingredients together (you might need to get your hands in to get it to all come together properly!)
  • Divide into walnut size pieces and flatten on a greased baking sheet.  I like to flatten them with a fork to get the pretty lines on them.  Rhys prefers to squish them down with his hands.  Either method works fine!
  • Cook in preheated oven at 190 degrees for 8-10 minutes.
  • Sprinkle with icing sugar when cool.

Easy chocolate biscuit recipe

These seem to be a little bit better after they’ve properly cooled down – they’re quite soft and a bit cakey and if you eat them straight away when they’re still warm you’ll need a nice glass of water or milk to help wash them down!

Either way though, they’re a fab little chocolate hit if you’re ever in the need of a quick fix!

Cuddle Fairy
Simply carrot and lentil soup slow cooker

Slow cooker carrot and lentil soup

We have a bit of a routine in our house.  On a Sunday I’ll cook a whole chicken in the slow cooker (which you have to try if you’ve never done it before).
Then on Sunday evening my husband will strip the chicken, pop the bones back in the slow cooker and make delicious stock, which I’ll use on a Monday to make this slow cooker carrot and lentil soup.
Slow cooker carrot and lentil soup (2)
Slow cooker carrot and lentil soup

One of my favourite things about this recipe is that it’s so flexible.  You don’t have to worry too much about measurements, it’s a rough and ready kind of soup!  So if you fancy a more carroty soup then chuck a few extra in.  If you like a thick soup then go crazy with the lentils.

But to get you started, here’s my basic recipe:

  • 1 litre stock (chicken or vegetable is fine, and I’ve made it several times using stock cubes instead of ‘proper’ stock and it still tastes great)
  • 2 large or 4 small/medium carrots
  • 100g of lentils
  • A few shakes of black pepper
  • 1 teaspoon ground coriander
  • 1 or 2 tablespoons of curry powder

carrot and lentil soup slow cooker

Chop the carrots up into pieces about the size of a pound coin and chuck them in the slow cooker.  Add the stock, lentils and spices.  If you fancy you can put some chopped onion in too.

Cook on low for about 8 hours.

Blend, taste and add more seasoning if you feel like it, and serve!

Slow cooker carrot and lentil soup

This recipe tends to make just about enough for dinner for me and Steve and leftovers for him to take to work for lunch the next day.

If you like this you might also like:
Slow cooker jacket potato recipe

Picture

Slow cooker jacket potato recipe

I feel a bit cheeky calling this a recipe really, because it’s just so simple.  But, it does seem to be one of those things that people just don’t know about/haven’t thought about doing!
Picture 

I love using my slow cooker, even now that I’m at home with the children during the day I still prefer to have something cooking away in it and being able to relax a bit knowing that I’m not going to be rushing around in the evening trying to make something.

Now, I know that jacket potatoes aren’t particularly tricky or stressful to cook in the oven or the microwave, but I do still find those methods a bit of a faff!  I don’t think I’ve never actually done them in the oven and I always get annoyed when I microwave them because you get the nasty spot on the bottom that’s just hard and horrible.

So for me, being able to do them in the slow cooker is perfect.  I pop them in the in the morning, prepare toppings in the afternoon, then they’re all ready to serve at dinner time!

Picture 

So, how do you go about cooking jacket potatoes in the slow cooker?  Easy peasy!

  • Get some foil or baking parchment and scrunch a few pieces into balls and put them in the slow cooker.  You want enough to cover the base.


  • Rub a bit of oil, salt and pepper into the potato skins.


  • Wrap them in foil.


  • Put them in the slow cooker, on top of the scrunched up foil/baking parchment.


  • Cook on low for about 8 hours.


  • Remove and top with whatever you fancy – we normally go for tuna mayo, beans and cheese!


  • Enjoy!

That’s really all there is to it.  A few things to note though:

  • As is the way with slow cooking, the skins won’t be at all crispy, so if that’s important to you then you might want to either stick to oven cooking them, or cook them this way then pop them in a hot oven for 5 minutes to crisp them up.


  • You really don’t need to add any water to the slow cooker.


  • I’ve never pricked the potatoes and they come out great every time.

How do you like your potatoes?!

Cuddle Fairy