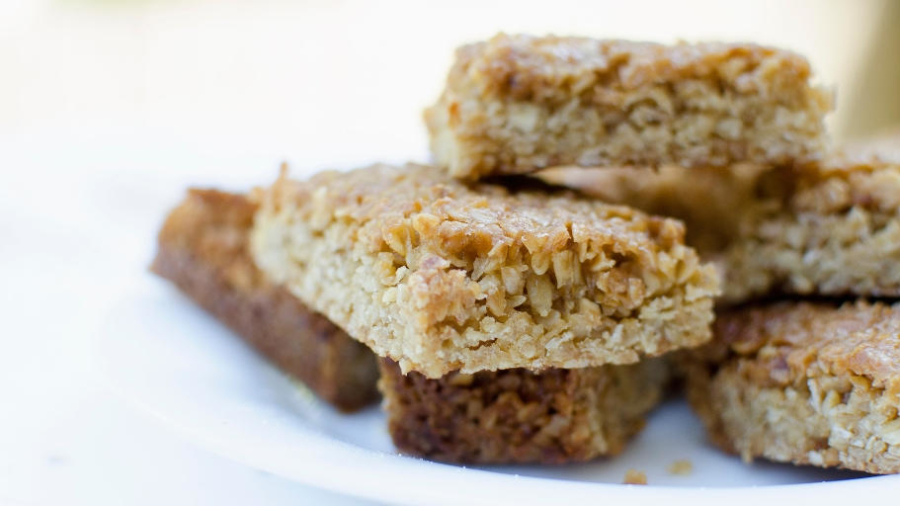
Perfect simple flapjack recipe

Simple and classic flapjack recipe

Flapjacks are one of my favourite sweet treats to make (and eat). The ingredients list is lovely and short, and they’re nice and quick to throw together if you don’t have loads of time to spend baking.

I also love that you can change things up quite easily by adding in a few extra ingredients, like with my lemon curd flapjacks.

But these flapjacks in particular are simple and classic and delicious, perfect pretty much any time of the day. Here’s the recipe if you want to give them a go yourself.

Ingredients:

  • 125g butter
  • 125g brown sugar
  • 3 tablespoons golden syrup
  • 250g oats

Here’s what you need to do:

  1. Preheat the oven to 180 and line a 7 x 9 inch cake tin with greaseproof paper
  2. Put the butter, sugar and golden syrup into a pan and melt it all together over a low heat
  3. Once all the butter has melted and the sugar has dissolved, take the pan off the heat and stir in the oats
  4. Mix everything together really well so all the oats are coated in the buttery, syrupy mixture
  5. Tip the mixture into the lined tin and press it down really well with the back of a wooden spoon or a spatula
  6. Bake at 180 for 18 minutes
  7. Leave to cool for a few hours, or even better, over night
  8. Cut into squares and enjoy

Flapjacks are one of those things that seem like they should be foolproof but so often they don’t come out quite right.

I know I’ve made them a few times in the past and they’ve ended up not coming together properly and crumbling everywhere.  Other times I’ve let them bake for a bit too long and they’ve been hard and crunchy when I really want them softer and chewy.

The best advice I’ve found for getting flapjacks right is:

  • Really make sure you press the mixture down well into the tin
  • Bake them until they’re just golden and still feel a bit soft when you take them out of the oven
  • Leave them to cool and set in the tin for as long as possible, ideally overnight, before cutting up and enjoying

These flapjacks are classic and so tasty just as they are.

But if you want to you can jazz them up by stirring in a few spoonful’s of nut butters or by adding different seeds, raisins and/or chocolate chips.  You could also add a layer of melted chocolate to the top once they’ve cooled in the tin, then leave that to set as well before cutting into squares.

Like this? Pin it for later!

Violife vegan cheese

Violife vegan cheese alternatives: review from a non-vegan family

My family and I aren’t vegan, but my daughter is vegetarian and the rest of us enjoy eating a mixture of meat-based and meat-free meals. So we’re really open to trying vegetarian and vegan alternatives to the different foods we eat.

When Violife asked me if we wanted to try some of their vegan cheese alternatives I jumped at the chance, because we get through a fair bit of cheese in our house and I was curious to know what the vegan alternatives were actually like.

The first thing that really surprised me was the range of cheeses that you can get from Violife.

Because I don’t normally buy vegan cheese I’ve not really paid that much attention to all the options that are available, so I was really impressed when I realised how much choice there is now.

The Violife range includes everything from blocks and slices of vegan cheese to vegan alternatives to soft cheese, camembert, and mozzarella. And they come in some delicious flavours too, like smoked cheese and tomato and basil.

I also love the fact that Violife have a load of vegan recipes on their website which is perfect for inspiration on ways to cook with their products.

The products my family and I tried from Violife were:

  • Le Rond camembert flavour
  • Smoky cheddar flavour slices
  • Epic mature cheddar flavour block
  • Original flavour slices
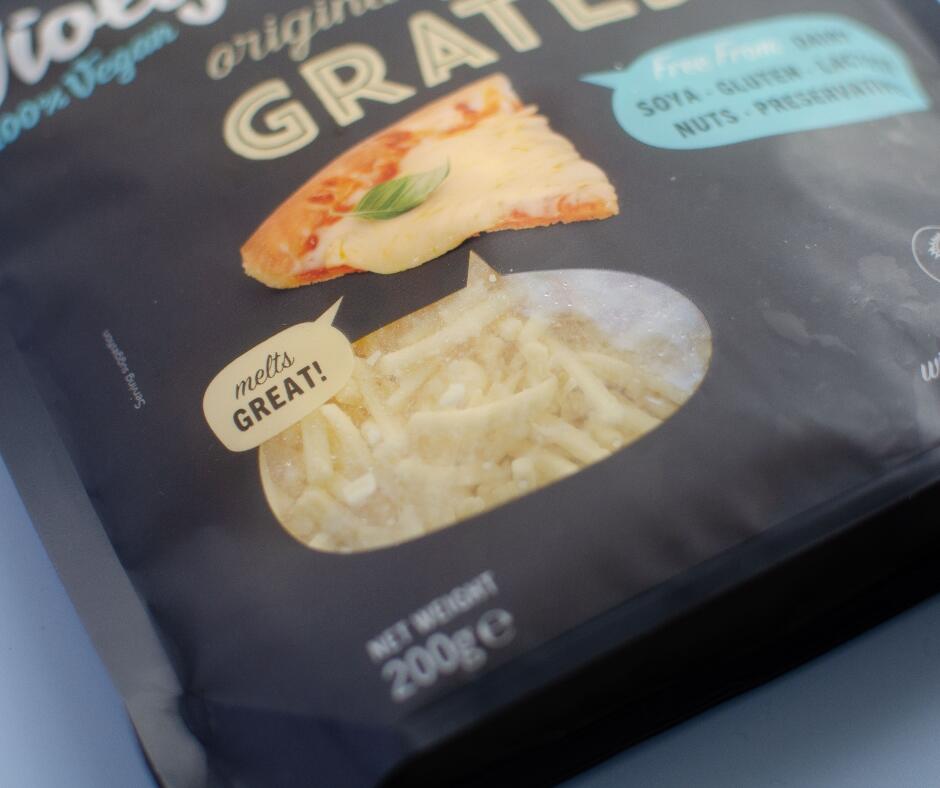
  • Original flavour grated

They’re all made with coconut oil, starch, and sea salt, enhanced with vitamin B12 and with different flavourings added to create the different options.

I really wasn’t sure what to expect when I tried the different products, and was a bit worried that the texture and taste might not be all that great. So when I first bit into one of the Smoky Cheddar flavour slices I was immediately impressed with how good it tasted and how similar the texture was to standard cheese slices.

These would go perfectly with crackers for a snack and would also taste amazing in a toastie, although I’ve been enjoying just sneaking a slice now and then from the fridge.

The texture and taste of the other cheeses are all just as good as the smoky slices, and I’m not even sure I’d notice that the cheddar flavour slices and block weren’t dairy if I had them in a sandwich with some chutney and lettuce.

Where there is a more obvious difference is with the way Violife melts when you put it in a toastie or on top of a pizza. It does melt really nicely and has a good bit of stretch to it like you’d expect from a melted cheddar or mozzarella, but it’s a very different texture to what I’m used to with dairy cheeses.

I found with both the cheddar flavour slices and the grated option that the texture was soft, almost paste-like, which is actually a lot nicer that it perhaps sounds! I had a few of the cheddar flavour slices in a toastie with some tomato relish for a super quick, really tasty lunch. All I would do next time is use a few more slices than I did this time, because with the way they melted down the toastie wasn’t as full (or filling) as I’d normally make them.

To try out the grated Violife I made a quick pitta bread pizza, with a simple tomato sauce and the grated cheese. I popped it under the grill for about 8 minutes for the cheese to really start to melt and start to brown in a few spots.

Next time I’ll put a bit more of the vegan grated cheese to really get a good covering, because it didn’t melt and spread the way our normal mozzarella does.

All in all though, once I was used to the unfamiliar texture, this pizza was really tasty. The Violife has a pretty subtle flavour that worked really well with the tomato sauce, and the fact that it comes ready-grated in the pack made making the pizza ridiculously quick and easy.

I have honestly been so impressed with all the cheese alternatives we tried from Violife. And while I don’t think we’ll be giving up our usual cheddar and mozzarella quite yet, I would definitely pop some of these in our trolley for a change now and then.

It’s also really good to know that if Nerys decides to make the move from vegetarian to vegan at some point that there are some brilliant, tasty cheese alternatives out there so she can still enjoy the meals she likes.

Disclosure: I was sent the products to try for the purpose of this review but all thoughts and opinions are my own.

paella recipe

Genuine Spanish seafood paella recipe

If we talked about the most consumed foods around the world, then rice would be right up there in the top 5.

The origin of rice is a question that we don’t have a definite answer to, to this day. Although many people claim that it originated in China, some researchers claim that it comes from India. In short, it is not easy to conclude its origin, but what is certain is that it is one of the most versatile and nutritive foods we have. 

A staple food that acquire many flavours

Many recipes around the world use rice as the main ingredient. Here are just a few:

  • Risotto: This is an Italian dish made with round rice accompanied by vegetable stock, chicken, mushrooms, and spices and some include a touch of wine in their recipes. It is one of Italy’s signature dishes. 
  • Biryani: In India, biryani is another rice-based dish. The rice is cooked with vegetables, nuts, and of course, lots of spices.
  • Arroz Chaufa: This is a famous dish from the Peruvian Chifa cuisine. It is cooked rice that is combined with a garlic and ginger stir-fry and soy sauce, vegetables, peppers, onions, chicken, pork, or prawns.

An iconic meal of the Iberic peninsula

Paella is a meal created in Valencia, Spain; its main ingredient is rice and saffron and can include poultry, seafood, and/or vegetables. Each region of Spain has its paella recipe and that’s what makes it special.  

Some styles of paella are : 

  • Paella Valenciana: This is the authentic and original paella. It is prepared with a sauce of tomato, pepper, onion, and garlic. The tradition of using rabbit meat makes it a dish with a unique flavour. 
  • Paella de Carne: this is a style of paella that you can eat on weekends with your family. It is usually made with chicken meat, and the use of black pepper and sweet paprika gives it a very particular taste. 
  • Paella Negra: a typical dish from Galicia, it takes a black colour from the ink of the octopus or squid used. It is made with seafood such as shrimps and prawns, like traditional seafood Paella, but the black ink gives it an appearance and flavour that makes it different from the others. 

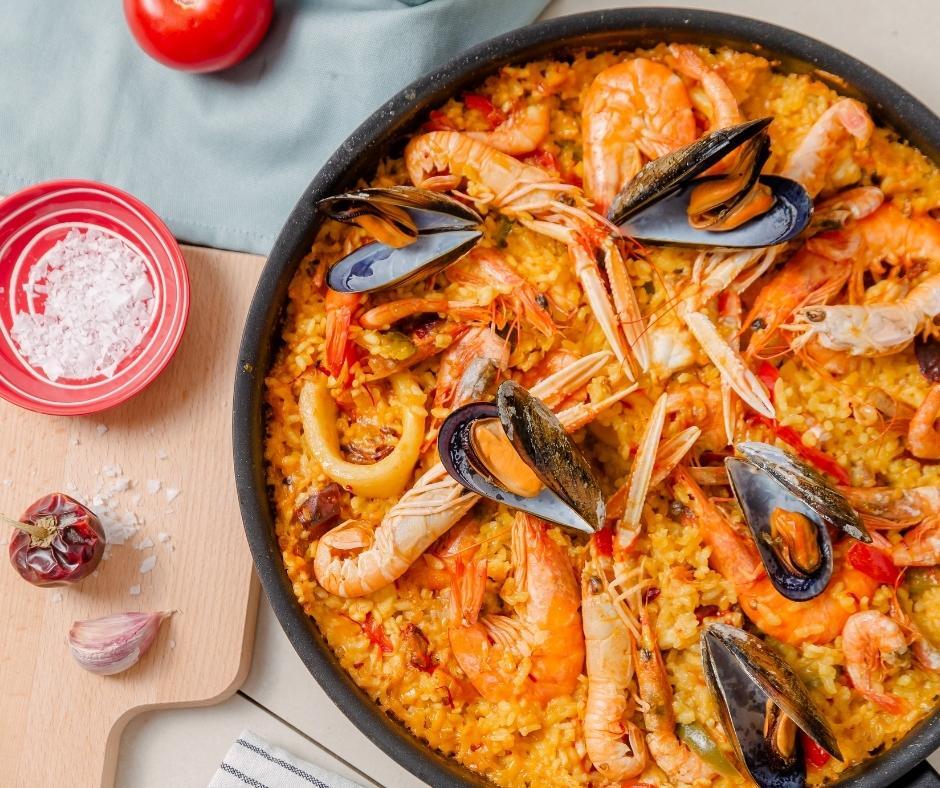
In this post, I will show you an exquisite recipe for one of the most delicious Spanish meals: Seafood Paella, cooked on a grill or bbq for a really special flavour.

Since I’m very sure you will love it, I’ve provided the next recipe for a large number of servings. Enjoy it!

Before you continue onto the recipe, you may like to know an alternative seafood paella here:  https://mahatmarice.com/recipes/authentic-spanish-paella-seafood/

Seafood Paella (6 servings)

Ingredients
  • 4 ½ cups of chicken stock.
  • ½ tsp. of crumbled saffron threads, (loosely measured).
  • ¼ tsp. of salt.
  • 3 tbsp. of olive oil.
  • ½ yellow onion (finely chopped).
  • ½ red bell pepper (finely chopped). 
  • 3 cloves of garlic  (finely chopped or just crushed, to your taste). 
  • 200 grams of rounded cut mild dried chorizo sausage. 
  • 3 cups of short-grain rice (Bomba rice or Arborio will work perfectly).
  • 1 can or 450 grams of fire-roasted diced tomatoes.
  • 1 cup of frozen green peas.
  • 450 grams of large shrimp (peeled and deveined). 
  • 450 grams of rinsed and scrubbed mussels.
  • 450 grams of rinsed and scrubbed littleneck clams.
  • ¼ cup of chopped parsley. 
How to prepare
  1. Preheat the grill to 190°C if using a gas grill. If wood-fired, light the wood until a grey layer of ash covers it.
  2. In a saucepan, put the chicken stock to a boil, add the saffron and salt. Turn off the heat and reserve for 15 minutes. Add more salt if necessary.
  3. To prepare the sofrito, heat the oil in a large-sized skillet over medium heat. Sauté the red bell pepper and the onion for 7-8 minutes until they’re soft. Then add the chorizo and the garlic. Stir fry for 3 minutes. 
  4. Take the skillet to the grill and add the rice to the sofrito. Cook it for about 5 minutes, then add the stock, the peas and the tomatoes. Sprinkle a little more salt if it’s necessary. 
  5. Close the grill. Let the rice cook for 15 minutes or until the stock is absorbed (do not stir). 
  6. After 15 minutes, open the grill and place the mussels and clams hinge side up. In this position, they will release their juices over the rice. Add the shrimp around the mussels clams.
  7. Cover the skillet with foil and leave cooking on the closed grill until the rice and shrimp are ready, and the mussels and clams are open. 
  8. Check to see if the bottom of the skillet has a golden colour. If not, keep cooking for a few minutes more until the bottom lightly caramelizes. Add the parsley on top.

Serve and enjoy!

Notes

Mussels and clams should be discarded if they have not opened after step 7 of the cooking process.

Disclosure: this is a collaborative post

nasi goreng recipe

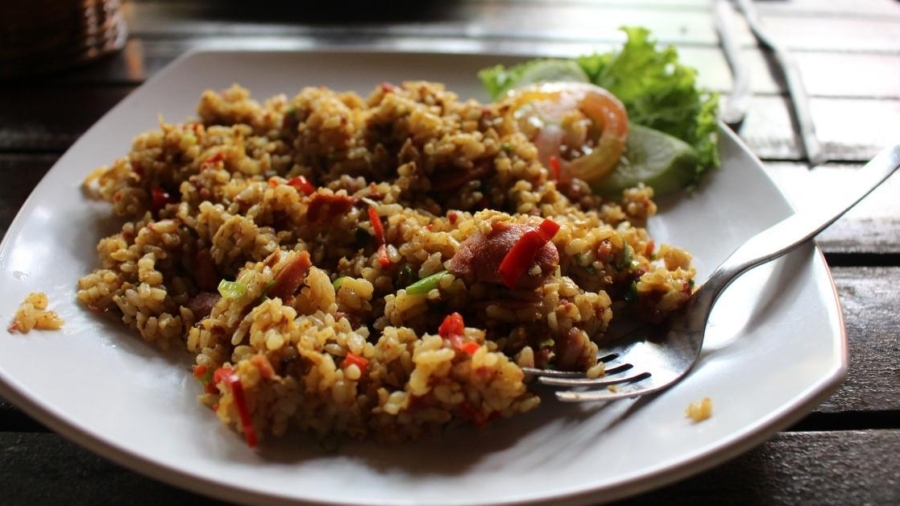
Nasi Goreng: an exotic Malaysian recipe you can easily enjoy at home

In case you’re not familiar with Southeast Asian food, nasi is the Indo-Malayan word for “rice”, a very common ingredient in Asian cuisine.

But this recipe has a trick, and what makes this dish different from other rice recipes is the goreng part of it: in this preparation, the grains are fried and so the final result has a very characteristic smoky taste.

One dish, many possibilities

Nasi goreng is widely eaten in Malaysia, Indonesia, Singapore and Brunei, and every country has their variations, depending on the ingredients particularly used in each specific area.

This traditional dish is so popular and easy to make that you can find it almost everywhere if you visit any of these countries. Some more glamorous and expensive variations might be only available at restaurants, but others are easily found when you go sightseeing and look for some street food. Frozen and ready to microwave versions are sold in supermarkets as well!

And outside the Asian area, you can try a pretty good nasi goreng in the Netherlands if you happen to live there or go for a visit. Thanks to the big Indonesian community living in that country, this dish has become extremely popular in this part of Europe. 

Unveiling the magic

As a rule, it is said that the secret to any tasty nasi goreng is the combination of animal-derived ingredients, such as eggs, seafood or meat; a spicy touch, given by some garlic, spring onions, some chili or turmeric, sweet soy sauce, and a pinch of salt and black pepper; and finally some condiments, like krupuk, pickles, fried shallots, and some cucumber and tomato, to create a unique flavor blend each time.

Crispy and affordable

Another great thing about nasi goreng is that leftover rice is preferred over freshly cooked rice, because it is less moist and so the result is crispier.

Apparently, the story says that this dish comes from a Chinese fried rice tradition that was invented to avoid wasting the extra rice. This makes total sense if we come to think that Malaysians typically have this dish for breakfast, using the leftover rice from the night before. Can you imagine having such a tasty and healthy filling breakfast? 

What are you waiting for? Give your frozen rice a chance with this easy egg fried rice recipe and be ready to experience all the flavors from Southeast Asia!

Ingredients

  • 1 cup of left-over white rice.
  • 2 beaten eggs.
  • ¼ cup of shredded chicken.
  • 3 prawns.
  • 1 stick of spring onion.
  • 1 shallot onion.
  • ½ red bell pepper.
  • 1 carrot.
  • 1 clove of garlic.
  • 1 tbsp. of sambal oelek (Malaysian chilli sauce).
  • 1 tbsp. of sweet soy sauce.
  • Some krupuk or prawn crackers (if you fancy).
  • Salt to taste.
  • Cooking oil.
  • Some sliced tomato and or cucumber (for freshness and decoration).

 Preparation

  1. Chop your clove of garlic and add it to a big pan or wok at medium heat with some cooking oil. Add your prawns and your chicken and stir fry until they look ready and have acquired some taste from the garlic. Set aside.
  2. Chop your spring onion, shallot onion, red bell pepper and carrot and add them to the pan. Add some extra cooking oil if necessary. Stir fry and add the beaten eggs and a pinch of salt. Whisk vigorously to prevent the eggs from getting an omelette texture. You want your eggs to be rather scrambled.
  3. Add your left-over rice and let it fry a bit. Set your stove to high heat and add the chicken and the prawns previously cooked. Mix well and add the sambal oelek.
  4. When you see everything is nicely mixed and done, that is, your rice has acquired a nice brownish colour, add your sweet soy sauce and mix one last time, just before turning off the heat.
  5. Let it cool down a bit and serve with some tomato or cucumber slices on top. Include some pieces of prawn crackers if you like it as an extra snack.

If you happen to try this recipe but you don’t have any leftover rice, don’t worry! You can totally cook your rice as you would normally do. It’s better if you let it cool down for a while before frying it.

Disclosure: this is a collaborative post

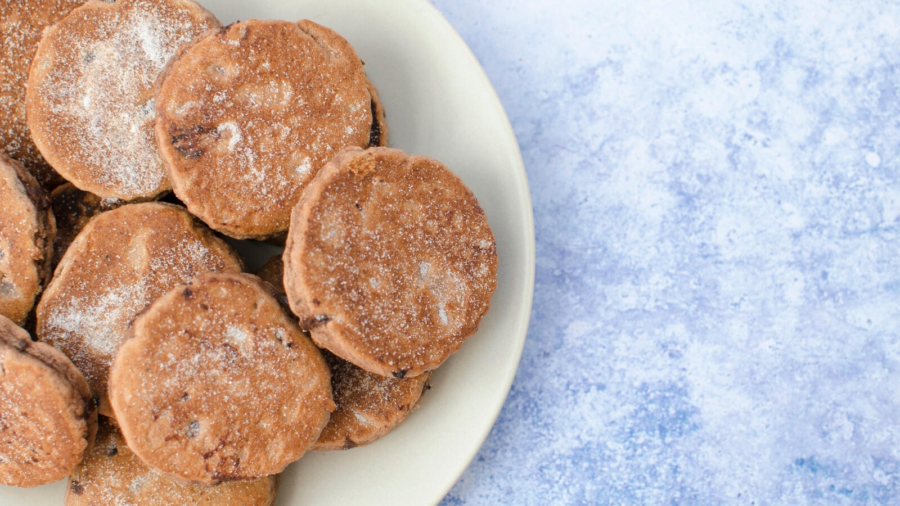
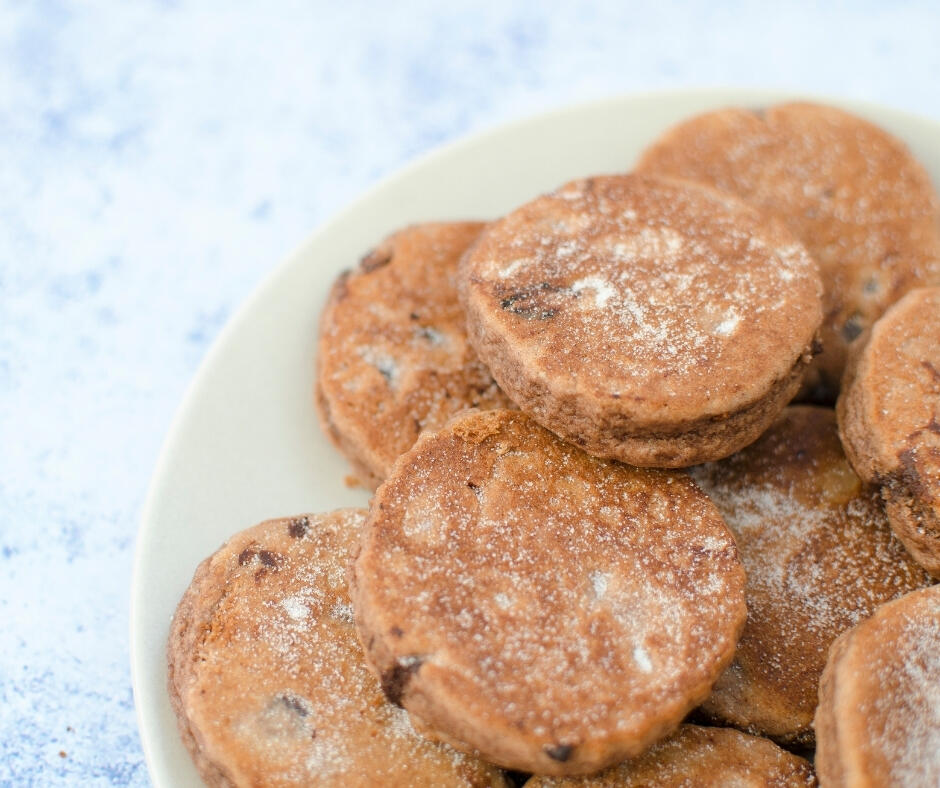
chocolate chip Welsh cakes recipe

Simple chocolate chip Welsh cakes recipe

I’m sure there are people out there who’ll shout at me for calling these Welsh cakes, when I should probably call them chocolate chip griddle cakes or something.

If you’re looking for a classic Welsh cake recipe then I do have one of those, but these are a delicious, chocolatey take on them that are perfect for anyone who likes the idea of Welsh cakes but isn’t all that keen on raisins.

They’re just as simple to make as normal Welsh cakes and are the perfect sweet treat for any time of day.


If you want to give them a go yourself, here’s what you need to know:


Ingredients

  • 220g (7.5oz) self raising flour
  • 1 tbsp cocoa powder
  • 115g (4oz) butter (plus a bit extra for the pan)
  • 85g (3oz) caster sugar
  • 1 tsp mixed spice
  • Handful of chocolate chips
  • 1 egg
  • Splash of milk (if needed)

Equipment

  • Mixing bowl
  • Scales
  • Heavy based frying pan
  • Rolling pin
  • 6cm round cutter
  • Spatula to turn the welsh cakes as they cook


Here’s what you need to do:

  1. Put the self raising flour and butter into a big mixing bowl.  Rub the butter into the flour with your fingertips, until the mixture looks like fine breadcrumbs.
  2. Stir in the cocoa powder, mixed spice, sugar, and chocolate chips.
  3. Add the egg and bring the mixture together into a soft dough.
  4. If it’s too dry to come together properly add a splash of milk.
  5. Turn the dough out onto a floured worksurface and roll it out to about 1/4 inch thickness.
  6. Cut circles out using a 6cm round cutter.
  7. Lightly grease the pan and then put on the hob on a medium/low heat.
  8. Cook the Welsh cakes a few at a time, for 2-3 minutes on each side.
  9. The Welsh cakes should be lightly browned and slightly risen
  10. Once they’re cooked take them out of the pan and sprinkle them on both sides with caster sugar.
  11. Enjoy!


These Welsh cakes are so good when they’re still warm from the pan and the chocolate chips are all still melty and gooey.  But they’re also perfect the next day when they’ve cooled down.

You can store them in an airtight container and they should keep for up to a week, if you can stop everyone from devouring them straight away.

Chocolate chip Welsh cakes

Prep Time10 minutes
Cook Time20 minutes
Cuisine: Welsh
Keyword: Chocolate Welsh cakes, Welsh cakes

Equipment

  • Scales
  • Mixing bowl
  • Rolling Pin
  • 6cm round cutter
  • Heavy based frying pan
  • Spatula

Ingredients

  • 220 grams self-raising flour
  • 1 tablespoon cocoa powder
  • 1 teaspoon mixed spice
  • 115 grams butter plus a little extra for cooking
  • 85 grams caster sugar plus a little extra for sprinkling
  • 1 handful chocolate chips
  • 1 egg
  • 1 splash milk if needed

Instructions

  • Put the self raising flour and butter into a big mixing bowl.  Rub the butter into the flour with your fingertips, until the mixture looks like fine breadcrumbs. 
  • Stir in the sugar, cocoa powder, mixed spice and chocolate chips.
  • Add the egg and bring the mixture together into a soft dough.
  • If it's too dry to come together properly add a splash of milk.
  • Turn the dough out onto a floured worksurface and roll it out to about 1/4 inch thickness.
  • Cut circles out using a 6cm round cutter.
  • Lightly grease the pan and then put on the hob on a medium/low heat.
  • Cook the Welsh cakes a few at a time, for 2-3 minutes on each side.
  • The Welsh cakes should be lightly browned and slightly risen.
  • Once they're cooked take them out of the pan and sprinkle them on both sides with caster sugar.

Simple and tasty white rolls

Easy soft white rolls recipe


I could never follow a low-carb diet – I love bread way too much.

The smell of freshly baked bread is one of my favourite smells in the world, and I could happily eat bread in one form or another with every meal of the day.

I always thought it was quite hard to make though, so most of our bread came from the supermarket until quite recently.

Then we started trying to really limit our trips to the shops during the first lockdown, and decided to try making our own bread to keep us going between visits.

This recipe for beautifully soft white bread rolls is one Steve has perfected over the last few months.  We’ve used it time and time again and it hasn’t failed us yet.


The main thing we’ve learnt about making any kind of bread is that it’s really not hard, but it does generally take time.  You have to know in advance that you want to make it, so the dough has plenty of time to do its thing before baking.

These soft white rolls need proving twice, so the whole thing from start to finish takes a few hours, but it is so worth it!

If you want to give them a go yourself, here’s what you need to know:


Ingredients

  • 450g plain flour
  • 7g instant yeast (we use Fermipan dried yeast)
  • 35g sugar
  • 1 tsp salt
  • 42g butter (melted)
  • 1 egg
  • 240ml warm water


Here’s what you need to do:

  1. Put the flour, yeast, sugar and salt in a big bowl and stir together.
  2. Add in the melted butter, egg and water and mix.
  3. Bring the dough together in the bowl and then tip it out onto a floured surface.
  4. Knead the dough for about 5 minutes until it’s soft and elastic.  The dough will be a little bit sticky but shouldn’t get stuck all over your hands.  If it feels too sticky then add a little more flour.
  5. Gather the dough up into a loose ball and pop it back in the bowl.
  6. Cover the bowl with a tea towel or some cling film and leave it somewhere warm to rise.  You want it to double in size which generally takes between 1 and 2 hours, depending on how warm the room is.
  7. When the dough has doubled in size tip it out again onto a floured surface.
  8. Gently pat it down to knock some of the air out of it, and then divide it into 8 equal-sized portions.
  9. Line a large baking tray with greaseproof paper or a silicone baking mat.
  10. Form each of the portions of dough into bun shapes, gently tucking the ends underneath so the tops look nice and smooth, then place them spaced out on the baking tray.
  11. Dust them lightly with flour and cover loosely with a piece of cling film.
  12. Leave to rise again, for about an hour.
  13. Pop the oven on at 190° (170° fan oven)
  14. Sprinkle the buns with a little more flour and then bake for 13-15 minutes.
  15. Once they’re baked and lightly browned on top, take them out of the over and leave them to cool slightly on the baking tray.
  16. Gently separate the buns if they’ve joined together during baking and move them to a rack to finish cooling.


I know this looks like quite a few steps but honestly it is so easy.

It’s basically a case of mixing the dough together, leaving it in a blob for a few hours, dividing it into 8 buns, leaving them to rise again for an hour, and then baking.

So don’t let the number of steps or the length of time needed to make these put you off.  It might take a few hours for them to be ready, but you’re only actually doing something with them for about 20 minutes of that.

And these buns are so worth the wait.

They’re perfect to use at lunchtime instead of sandwiches and are also sturdy enough to dip in a bowl of soup.

The fact that they’re slightly sweet also means they’re amazing split in half and toasted the day after you make them.  They taste like English muffins to me and are so good with proper butter and marmite.

We use these soft white rolls for burgers too, and if you want to make them into more classic burger buns you can brush them with an egg wash and sprinkle sesame seeds on top before baking, instead of dusting them with flour.

Print Recipe
5 from 1 vote

Easy soft white rolls

These rolls are perfectly soft and great for sandwiches, dipping in soup or to have with burgers for tea.
Prep Time20 minutes
Cook Time15 minutes
Proving time3 hours
Total Time3 hours 35 minutes
Keyword: Easy dinner rolls, Floury rolls, Rolls, Simple rolls, Soft white rolls, white rolls
Servings: 8 rolls

Equipment

  • Big mixing bowl
  • Big baking tray
  • Greaseproof paper or silicone baking mat
  • Tea towel or cling film
  • Weighing scales
  • Measuring jug

Ingredients

  • 450 g plain flour You can use strong bread flour if you like, but these work really well with simple plain flour
  • 7 g instant yeast
  • 35 g sugar
  • 1 tsp salt
  • 42 g butter (melted)
  • 1 egg
  • 240 ml warm water

Instructions

  • Put the flour, yeast, sugar and salt in a big bowl and stir together.
  • Add in the melted butter, egg, and water and mix together.
  • Bring the dough together in the bowl and then tip it out onto a floured surface.
  • Knead the dough for about 5 minutes until it's soft and elastic.  The dough will be a little bit sticky but shouldn't get stuck all over your hands.  If it feels too sticky then add a little more flour.
  • Gather the dough up into a loose ball and pop it back in the bowl.
  • Cover the bowl with a tea towel or some cling film and leave it somewhere warm to rise.  You want it to double in size which generally takes between 1 and 2 hours, depending on how warm the room is.
  • When the dough has doubled in size tip it out again onto a floured surface.
  • Gently pat it down to knock some of the air out of it, and then divide it into 8 equal-sized portions.
  • Line a large baking tray with greaseproof paper or a silicone baking mat.
  • Form each of the portions of dough into bun shapes, gently tucking the ends underneath so the tops look nice and smooth, then place them spaced out on the baking tray.
  • Dust them lightly with flour and cover loosely with a piece of cling film.
  • Leave to rise again, for about an hour.
  • Pop the oven on at 190° (170° fan oven).
  • Sprinkle the buns with a little more flour and then bake for 13-15 minutes.
  • Once they're baked and lightly browned on top, take them out of the over and leave them to cool slightly on the baking tray.
  • Gently separate the buns if they've joined together during baking and move them to a rack to finish cooling.

Notes

Don't be put off by the number of steps in this recipe - it's really not as complicated as it might look at first!
It's basically just mix the ingredients and knead the dough, leave it to double in size, split the dough into 8 equal pieces and form them into bun shapes, leave them to rise again on the baking tray and then bake.
You can make these into more classic burger buns by skipping the part about dusting them with flour before baking, and instead brush them with an egg wash (1 egg mixed with a tablespoon of milk) and then sprinkle with sesame seeds.

Easy and classic Welsh cakes recipe

Easy classic Welsh cakes recipe

I’ve lived in Wales for 20 years now, and there are so many things I love about being here.

The traditions and the culture.  Joe’s ice cream.  The stunning beaches.  The language that I’m finally starting to learn.  The words and phrases that I’ve picked up.

And Welsh cakes.

I’ve been buying Welsh cakes for years.  In packets from the shops and occasionally in paper bags, still warm from the griddle from the market.

But I’d never made them myself for some reason.  So this week I decided to finally give them a go.  And I can’t believe I waited so long.

They’re so easy to make and they are really, really tasty.


If you want to give them a go yourself, here’s what you need to know:


Ingredients

  • 225g (8oz) self raising flour
  • 115g (4oz) butter (plus a bit extra for the pan)
  • 85g (3oz) caster sugar (plus a bit extra for sprinkling)
  • Handful of raisins
  • 1 tsp mixed spice
  • 1 egg
  • Splash of milk (if needed)

Equipment

  • Mixing bowl
  • Scales
  • Heavy based frying pan
  • Rolling pin
  • 6cm round cutter
  • Spatula to turn the welsh cakes as they cook


Here’s what you need to do:

  1. Put the self raising flour and butter into a big mixing bowl.  Rub the butter into the flour with your fingertips, until the mixture looks like fine breadcrumbs.
  2. Stir in the sugar, mixed spice and raisins.
  3. Add the egg and bring the mixture together into a soft dough.
  4. If it’s too dry to come together properly add a splash of milk.
  5. Turn the dough out onto a floured worksurface and roll it out to about 1/4 inch thickness.
  6. Cut circles out using a 6cm round cutter.
  7. Lightly grease the pan and then put on the hob on a medium/low heat.
  8. Cook the Welsh cakes a few at a time, for 2-3 minutes on each side.
  9. The Welsh cakes should be lightly browned and slightly risen
  10. Once they’re cooked take them out of the pan and sprinkle them on both sides with caster sugar.
  11. Enjoy!


These Welsh cakes are amazing when they’re still warm from the pan, but are also just as good later on with a cup of tea.

You can store them in an airtight container and they should keep for up to a week, but they’ll never last that long in my house!  Luckily for me Nerys loves these as much as I do, otherwise I’d end up devouring the lot.

Simple classic Welsh cakes

These classic Welsh cakes are really simple to make and are a perfect teatime treat.
Prep Time10 minutes
Cook Time20 minutes
Cuisine: Welsh
Keyword: Classic Welsh cakes, Welsh cakes, Welsh cakes recipe
Servings: 20 Welsh cakes
Author: This glorious life

Equipment

  • Scales
  • Mixing bowl
  • Rolling Pin
  • 6cm round cutter
  • Heavy based frying pan
  • Spatula

Ingredients

  • 225 grams self-raising flour
  • 115 grams butter plus a little extra for greasing the pan
  • 85 grams caster sugar plus a little extra for sprinkling
  • 1 handful raisins
  • 1 tsp mixed spice
  • 1 egg
  • 1 splash milk if needed

Instructions

  • Put the self raising flour and butter into a big mixing bowl.  Rub the butter into the flour with your fingertips, until the mixture looks like fine breadcrumbs. 
  • Stir in the sugar, mixed spice and raisins.
  • Add the egg and bring the mixture together into a soft dough.
  • If it's too dry to come together properly add a splash of milk.
  • Turn the dough out onto a floured worksurface and roll it out to about 1/4 inch thickness.
  • Cut circles out using a 6cm round cutter.
  • Lightly grease the pan and then put on the hob on a medium/low heat.
  • Cook the Welsh cakes a few at a time, for 2-3 minutes on each side.
  • The Welsh cakes should be lightly browned and slightly risen.
  • Once they're cooked take them out of the pan and sprinkle them on both sides with caster sugar.