boohoo-boys-coat

Boohoo children’s clothing review

I don’t tend to go into town and browse in the shops these days.  What I do instead, is sit at home, with a  cup of coffee and browse online.  And one website I love to browse for clothes is boohoo.com.

So I was really happy to find out that they’ve started doing clothes for children too.

The clothes are for children aged 4-12, so there’s nothing suitable for Nerys quite yet, but I had a lot of fun looking through all the options for Rhys.

And with the weather suddenly turning more wintry I was really pleased to fine a lovely warm coat for him.

boohoo-kids-coat

The coat is really warm without being too bulky.  And the colour is just lovely, a bit different from what he’s had in the past.

He’s worn it pretty much every day since it arrived and he loves it.

We bought age 5-6 and it fits him perfectly.  Rhys is quite slight though, so if I had a bigger child I might be tempted to get the next size up.

We all really love the coat though, and think he did a great job modelling it for us on a recent trip to the beach!

boys-coat-boohoo-kids

I was also really pleased to see that the coat is machine washable.  One of the reasons I wanted to get him a second coat for winter is that he often comes home from school covered in mud.  So it’s important for me to be able to quickly pop a coat in the wash, while he wears the other one for a day or two!

I had wanted to get some trousers for Rhys too, but found there wasn’t much choice in that category.  I’m sure more items will be added as the kids section grows, but for now we ended up choosing a couple of t shirts to add to our order instead.

The first one I chose was this grey t shirt with a spooky/cute bat on it.  I liked the fact that he could wear it for halloween but it wasn’t too halloween-y.  So he can get a fair bit more wear out of it.

I ordered age 5-6 again and thought when it first arrived that it might be a little small.  But luckily as Rhys is pretty slim it fits him just right.

boohoo-kids-boys-tshirt

The second t shirt I chose was this baseball style one.  I love this style of top, and think it looks really cute on Rhys.

The material isn’t quite standard t shirt material though, so I’m waiting to see how well it washes.  For now though, I’m really happy with it.  Although, like the other items we bought it is a little on the small side, which works for us but might not be great for bigger children.

boys-tshirt-boohoo-kids-clothes

All in all, I’m really pleased with my experience with boohoo’s children’s range.  I would love to see more items available, but the clothes they do have are reasonably priced and we’re very happy with the quality and design of the bits we chose.

I also found that the items were delivered quickly, and were packaged up well so they arrived in perfect condition.  Also, boohoo often seem to have offers on delivery so it’s worth keeping an eye out for that!


I was given credit to spend at boohoo.com, but all words and opinions are my own.

the-book-of-everyone-review

The book of everyone – review

It’s the age old question isn’t it.  What do you get for the person who has everything?!

We all have at least one person on our ‘list of people to buy things for’ who doesn’t actually want/need anything for Christmas.

So, what on earth do you get for them?

I’ve always ended up going down the gift card route.  But now I’ve found another option.

The book of everyone!

the-book-of-everyone-review

If you’ve never heard of them before, these books are just fab.  And so easy (and fun) to create.

You just go to the website, enter a few details about the person you’re making the book for and then it creates a preview for you.

Then you have the really fun part of going through and customising it.

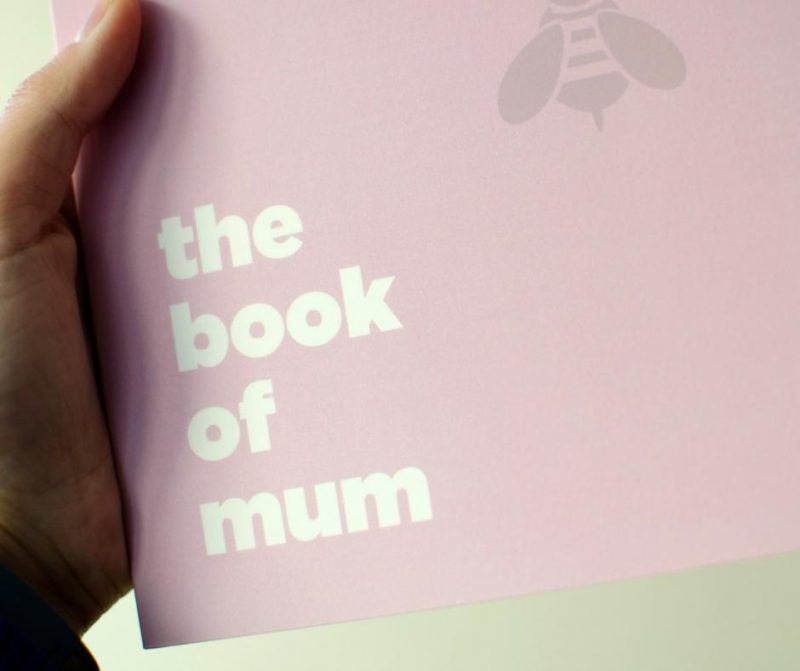
We decided to make a ‘book of mum’ recently for my mother-in-law’s birthday, so went for a lovely pink cover and set the title of the book to ‘the book of mum’.

book-of-everyone

We then had a lot of fun going through and finding all the different pages that we could personalise, to make it extra special for her.

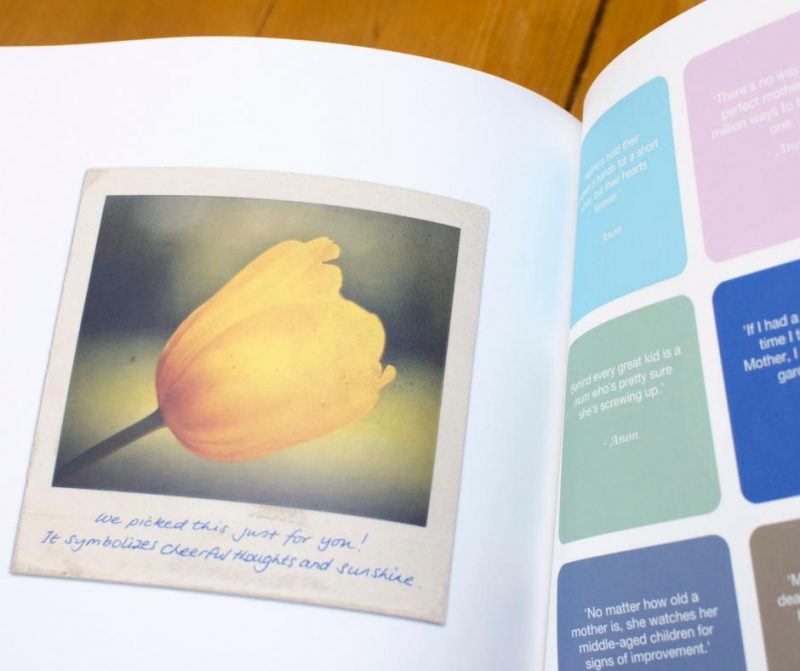
It’s really easy to click through the book preview and edit the bits you want to change.  There are pages where you can write in quotes or sayings that are personal to the person the book is for.  You can also change the images used, the colours and the wording on some pages.

book-of-everyone-1

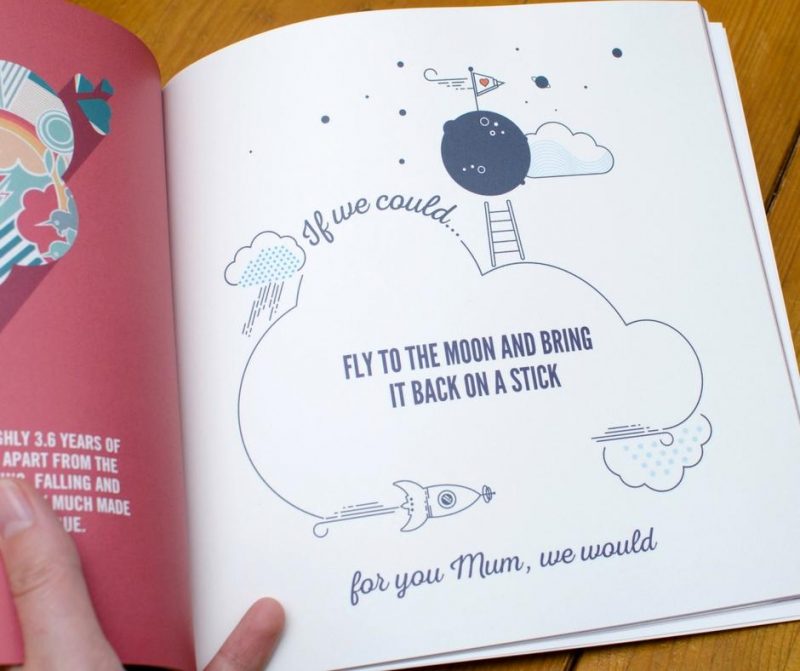
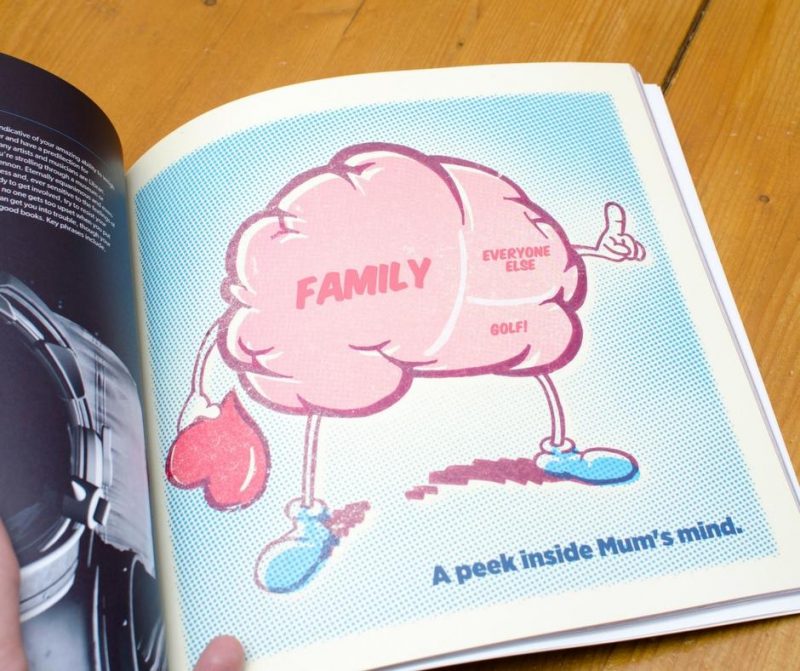
The books are really lovely and colourful and all the different illustrations really make it stand out and grab your attention.

And there is a great mixture of random facts, fun pictures and lovely quotes throughout the book.

book-of-everyone-2

When the book arrived I had a little nose at it to see what it was like before giving it to my mother-in-law, and I was so impressed with it.

We chose the paperback option, but it still felt lovely and sturdy; really great quality.

I love how you can have a quick flick through the book and pick out some fab little facts about the person it was made for.

But you can also sit down and take your time to properly read through it and really appreciate how personal it is.

I can see this being the kind of present that gets looked at again and again over the years.

And I love how you can make something so lovely and personal in a really short amount of time.  It’s perfect for busy parents who are trying to get a present sorted with children hanging off them and shouting for snacks!

book-of-everyone-3

You can buy the book of everyone as a paperback for just £19.50 (delivery is included in that price), or you can make it extra special and get a hardback copy.  Or if you’re buying for someone who spends all their time online you can even just buy a digital copy.

There are also a few variations on the book of everyone available.  So if, for example, you want to celebrate a milestone birthday then you can chose the book of everyone’s milestones edition.  There’s even a brilliant Christmas edition, just perfect for this time of year!

So there you have it, the perfect, fun, personalised present for that person on your list that you just don’t know what to buy for.  You’re welcome!


I was given a book of everyone to review for this post, but all words and opinions are my own.

Let them eat dirt and why keeping things clean might not be best for our children

Let them eat dirt

Lots of people, when they become parents, become obssessed with keeping everything clean.  They worry constantly about dirt and germs.

They do whatever they can to clean and sanitize and sterilise everything in their baby’s world.

But is this really the best thing to do?

I’ve always felt that a little bit of dirt is good for children.  That they need to be exposed to germs and bacteria to be able to build an effective immune system.

Let them eat dirt


To my mind, it’s like peanuts.

Stay with me, I’m going somewhere with this!

When I was pregnant with Rhys, the general advice was still to avoid eating peanuts and peanut products.  It was thought that this would help prevent peanut allergies in the baby.

But, I wasn’t convinced that this was right.

My gut feeling on it was that, surely, it’s better to expose the baby to small amounts of things like peanuts.  To me it made more sense that a child would be more likely to react to something that they’d never been exposed to at all.

So I did some research and it turned out that, at the time, the UK was pretty much the only place in the world to advise women to avoid peanuts during pregnancy and yet we had one of the highest rates of peanut allergies.

Women in other countries were happily enjoying their peanut butter on toast every morning and, if anything, doing so seemed to reduce the chance of their baby having a nut allergy.

So I made a choice to keep eating my peanut butter too.  And not long after that the advice here changed to say that it was ok to do so.

Because exposing babies to allergens early on makes it more likely they’ll build up a tolerance to it, which makes it less likely they’ll develop an allergy to it.

And I think of dirt and germs in a similar way.

If we expose our babies to these things, then they’ll build up a tolerance to it.  Their immune systems will develop to be stronger and more resistant to bugs.

And a new book has been released that supports my beliefs.

Let them eat dirt‘ is a really fascinating book on the benefits of exposing our children to dirt and microbes.

let-them-eat-dirt-book

It was written by B. Brett Finlay, PHD and Marie-Claire Arrieta, PHD and is all about this idea that our current obsession with keeping things clean and sterile is potentially harmful to our children.

Which makes me feel better about the absolutely non-sterile state of my home!

I remember when Rhys was a baby, and I was still worrying about sterilising his bottles, and his dummy.  My husband made the excellent point that he was crawling round on his hands and knees all day, and then putting his fingers in his mouth.  And his toys were often on the floor, and then in his mouth.

And he seemed to be doing fine!

So I relaxed a bit after that point.

And kept in mind that any germs and bacteria he did pick up would most likely be doing good things to build up his immune system.

This whole idea of sterilising bottles is actually addressed in the book:

“The American Academy of Pediatrics no longer recommends sterilizing bottles used for babies of any age.  If the water at home is safe enough to drink, it is also safe enough to use to clean bottle and nipples”

They also mention an interesting study that was conducted at the University of Gothenburg in Sweden.  The study found that children raised in homes that washed dishes by hand (rather than in a dishwasher) were less likely to develop ezcema by the time they reached school age.  Which suggests that “a less-efficient dishwashing method promotes more exposure to microbes early in life, which has been shown to protect children from allergies and asthma”.

And as for toys, the book’s authors suggest that they only need to be cleaned when they’re visibly dirty, or if they’ve been played with by a child that’s poorly.  And plain old soap and water will do too, no need to break out the dettol!

let-them-eat-dirt

So, if that’s the case with toys, which are more often than not left lying around on the floor, then is it ok to pick a dummy up off the floor and give it back to your baby?

You might judge me for this, but my response to a dropped dummy was always to just quickly pop it in my mouth to ‘clean’ it before giving it back.

But you often see parents grabbing a pack of wipes out of the changing bag to clean a dropped dummy.  Well, you can even buy little containers that keep them sterilised on the go!

According to ‘let them eat dirt’ though, my more relaxed approach might be for the best.

“A study by the Swedish research group suggests that the best way to clean a pacifier that has been dropped is to put it in your own mouth first.  They found that the sixty-five babies raised by parents that cleaned their pacifiers by mouth had a significantly lower risk of developing allergies at 18 and 36 months of age”

I honestly find this whole area of research fascinating.

A lot of the studies need to be replicated on a larger scale, but the findings definitely point towards it being a good thing for our babies and children to be exposed to microbes and bacteria.

So maybe we all need to relax a little bit.

Obviously we need to use some common sense and do what we can to stop diseases from spreading, and to be wary of germs from food that’s past its best.  And the authors aren’t saying we should actually be encouraging our children to eat dirt.

But maybe we need to cut down on the constant disinfecting and sterilising.  

I’m not saying we should live in a complete mess.  I think we all feel better when our homes are clean and tidy.  But, lets not get carried away!  Our homes don’t need to be sterile.  We don’t need to get rid of every last germ and microbe.

What we need to do is let our children be children.

Let them go out and play in the mud.

Let them explore the world around them.

Let them come home covered in dirt and grass stains, with grubby faces and mud under their fingernails.

I’ll leave you with a great final quote from the book:

 “Let your kid be a kid and interact with their world, and develop as kids have for the past million years.  Let them eat dirt!”


You can get a copy of ‘let them eat dirt’ via Amazon, just click on the image below:

I was given a copy of ‘let them eat dirt’ to review, but all words and opinions are my own apart from those indicated by quote marks.

This post has been linked up with KCACOLS.

heyworkout

Hey workout review

Back at the start of the summer I wrote a post about how it was time to get back into exercise.

And as part of that I tried out a 3 month membership with Hey Workout.

If you’ve not heard of them before then I highly recommend you go and check them out.

Basically, you sign up for membership on their website and then you get access to all their webcam fitness and yoga classes.  So what that means is, you watch the class live online and, if you want to, you can turn on  your webcam so the instructor can see you too.

They’ll then give you feedback and help throughout the class.

So it’s like going to a class, with the professional feedback to make sure you’re doing everything right, but without having to leave your house!

heyworkout-portrait-1

And if you can’t make it to the live classes then you can just play them back at a later date.  There’s a big library on the website with loads of different workouts to chose from.

Class options include:

  • Prenatal and postnatal yoga
  • Legs, bums and tums
  • Vinyasa yoga
  • Back and arm tone
  • HIIT – High Intensity Interval Training

I would say, if you’ve not exercised for a while, make sure you ease yourself in with some of the more gentle classes!

The classes might only be 30 minutes long but you really work for that time, so be prepared!

Now, I’ll be honest with you all here.  When I first signed up for my trial I was all geared up for making a change and getting back into some sort of a routine of exercising regularly.  But then I came down with a nasty throat infection, and life in general happened and things didn’t quite go to plan.

There’s a whole other post in there somewhere, about how to make exercise a priority and how to fit it in to a busy life, but that’s something for another day!

I honestly think though, if I had made attending the Hey Workout classes a priority then I would’ve seen great results.

Before I got ill I did several different classes and thought they were great.

The first class I did felt a bit strange to begin with as there’s no music playing, and I’m used to exercise dvds that always have music on alongside the trainer’s chat!

But after a few minutes I stopped noticing that, and in a way felt that the lack of music made it easier to focus on the technique and the moves.

If music is important to you though, you might want to have a cd ready to play when you go to do a workout!

The trainers at Hey Workout are all really experienced, and passionate about what they do.  And that comes through when you workout with them.  I found having them do all the moves with me, and counting down the reps as they do them, really helped drive me to keep going.

Sometimes if you go to a class at the gym the instructor will demonstrate the move and then stop, and I much prefer this approach where I feel like they’re in it with you!

So, if you don’t feel like you can make it to the gym for a workout, but want something a little bit more interactive than a dvd, then Hey Workout is a really good option.

If you click on the image below you’ll be taken to a page where you can sign up for a 14 day free trial, so you can see for yourself how good it is.

What have you got to lose?


heyworkout

I was gifted a 3 month trial with Hey Workout in exchange for my honest review.  All words and opinions are my own.

maxi-cosi-rodifix-air-protect-review

Maxi-Cosi RodiFix Airprotect car seat review

Before Rhys started school I really didn’t drive that much.

If we needed to go out to the local shops we would walk there, and I would have the big weekly shop delivered, rather than battle with taking him with me (he was a very lively toddler!).

But now he’s in school, and Nerys is in nursery a few mornings a week, I drive a lot more.

And I’m really conscious of wanting them both to be safe and comfortable in their car seats.

Rhys now has a Maxi Cosi RodiFix Airprotect seat that we all really love.

maxi-cosi-rodifix-air-protect-review

The RodiFix Air Protect seat is a group 2/3 seat, suitable for children aged 3.5 – 12 years, and 15 – 36 kilos.

Our seat is the River Blue option which we love, but there are several other lovely colours you can chose from.

I personally love the colour of the River Blue seat though, especially with the little bit of striped detail on the top section!

rodifix-maxi-cosi-review

One of the things that initially attracted us to the seat is the fact that it uses isofix.  

Installing the seat in the car using the isofix connectors was really quick and easy and the seat felt lovely and secure once it was in.

Unfortunately we had to change our car over the summer and our new one doesn’t have isofix.  However the RodiFix still feels nice and safe in the new car, secured in place by the seatbelt.

maxi-cosi-rodifix-airprotect-review

Speaking of the seatbelt, the RodiFix has a fab belt guide which holds the seatbelt in the right position, making it really quick and easy to do it up.

I’ve found that with the seatbelt in place through the guide Rhys is much more able to help me with doing up his seatbelt which does make life a bit easier.

maxi-cosi-rodifix-review

I love the fact that, because the head and shoulder support is fully adjustable, the seat will grow with Rhys.

Although I do find it funny to think that he’s comfortable in it now, aged 5, and yet he will still be able to use it when he’s about 12!

Knowing that the seat will last him for so long is really great though, and makes it feel like a really worthwhile investment.

rodifix-airprotect-maxi-cosi-review

Rhys seems really comfortable in his car seat, and it has 2 recline positions so if he ever falls asleep on longer journeys we can make him even more comfy.

Most importantly of all though, I love how safe the RodiFix is.

The headrest offers side-impact protection which helps to reduce the risk of head injury if we were ever in an accident.  And the seat also provides excellent side impact protection for the lower back and hips.

Of course, I hope we’re never involved in an accident but it’s really reassuring to know that Rhys will have some additional protection in his seat if anything does ever happen.

rodifix-airprotect-maxi-cosi-car-seat

We’ve been using the RodiFix Air Protect for several months now and are really happy with it.

I love that we’ve been able to use it in both our old car and our new car, as there is isofix available but the seat can still be used without it.

One thing we really noticed when we were moving the seat from one car to the next is how light it is!

It’s weighs just over 6kg which makes it a really good choice if you have to move it between cars a lot.  It’s also quite compact, which is really useful in our new car.  The seat belt plug is almost flush with the seat which can make doing up the belt quite fiddly and tricky.  But with this seat there’s actually a nice amount of room at the side of the seat to be able to get the seat belt in easily.

In our time with the RodiFix we’ve not come across any negatives at all, and I’m confident that Rhys is nice and comfy in it, which really makes a difference when we need to go on longer car journeys to visit family and friends.

You can read all the detailed specifications for the seat on the Maxi Cosi website.

I received this car seat for the purposes of writing this review, but all words and opinions are my own.

jord-wooden-watch

Jord watch review and giveaway

I realised at a wedding I was photographing recently, that I’d become one of those people.

One of those people who use their phone to check the time, rather than wearing a watch.

I think one of the reasons it happened to me is that I didn’t really know what style of watch suited me these days.

When I was younger I had a really funky, green, baby G watch.  But that doesn’t really work for me any more.

It’s a shade of green that I don’t really wear, and it just doesn’t really feel ‘me’ now that I’m in my 30s.

And a few years ago my sister bought me a lovely, pretty silver watch that I wear for special ocassions, but it’s just a bit too pretty and dainty for me to wear everyday.

It doesn’t sit quite right with my jeans and jumpers.

The thing is, I didn’t know what style of watch would go with the clothes I wear.

But then I started seeing these gorgeous wooden watches by Jord appearing on blogs and social media.  

And when I was offered the chance to review one I was over the moon.

jord-wooden-watch

I spent a really long time browsing Jord’s website.

All the watches are absolutely stunning, and there is so much choice in the women’s watches section.

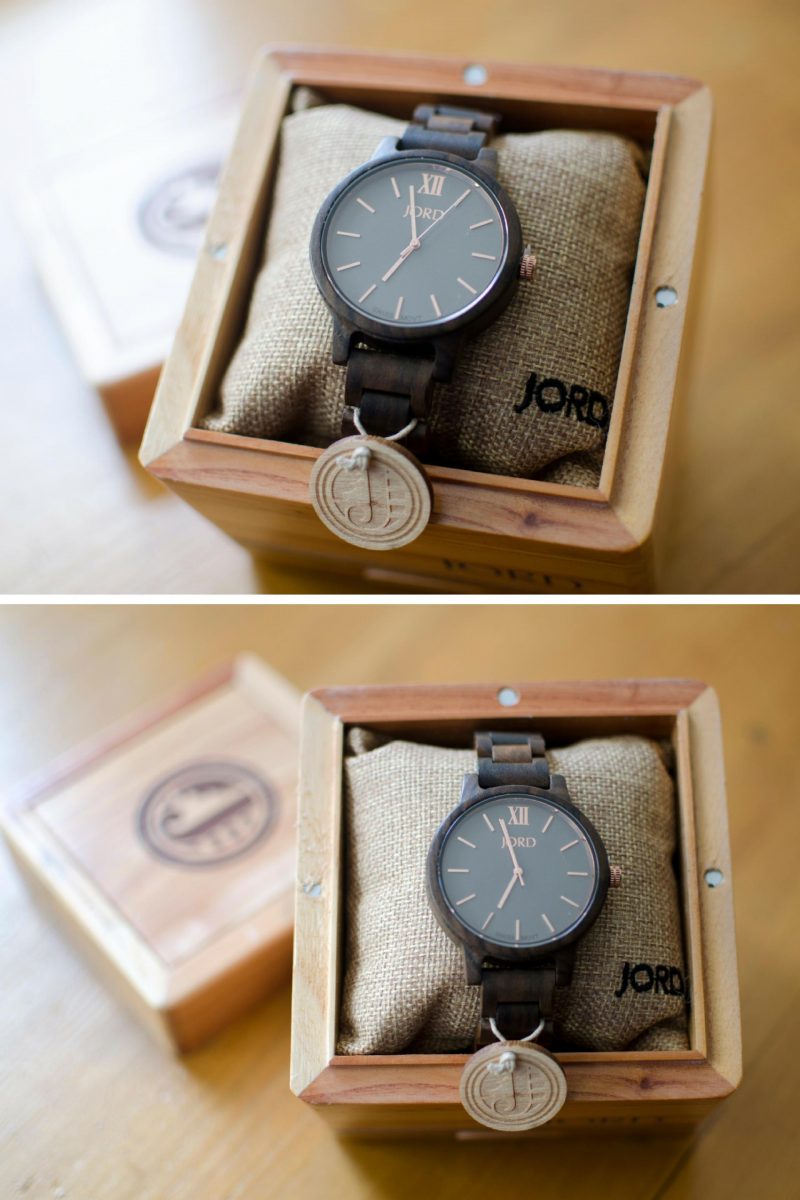
In the end though I chose the dark sandalwood and smoke watch from the Frankie series.

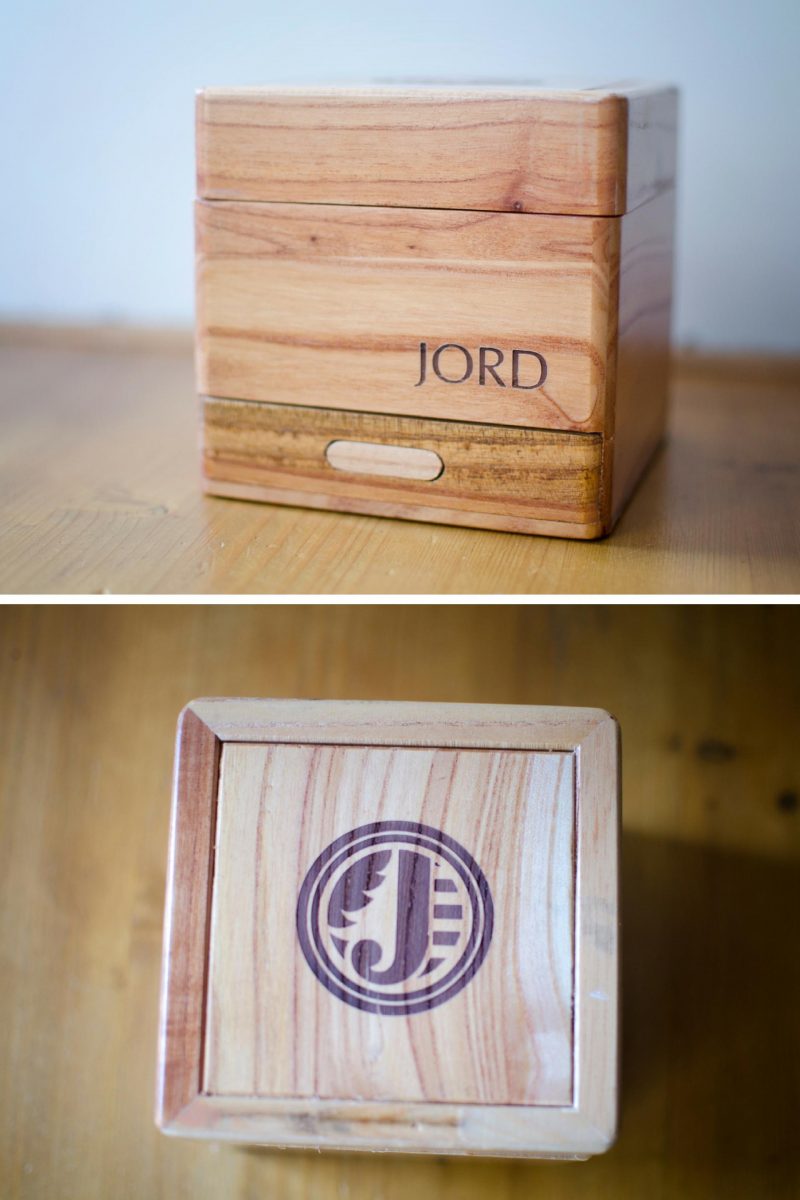
The watch arrived in a beautiful presentation box which I thought was a lovely touch.

jord-wooden-watch-box

If you were to buy one of these watches as a present I think the person you bought it for would be thrilled.  There’s something a bit special about the way it’s packaged up.

All the colours and materials used in the presentation box work really well with the natural style of the watches, and it all feels beautifully high-end.

jord-wooden-watch-box-001

I thought it might feel a bit strange wearing a watch again after not wearing one for so long.  But this watch just felt ‘right’ as soon as I put it on.

It’s much lighter than I expected it to be, so it’s really comfortable to wear.

I also really love the fact that the watchface is nice and big, and the simple, classic design makes it really easy to tell the time with a quick glance.

wooden-watch-jord

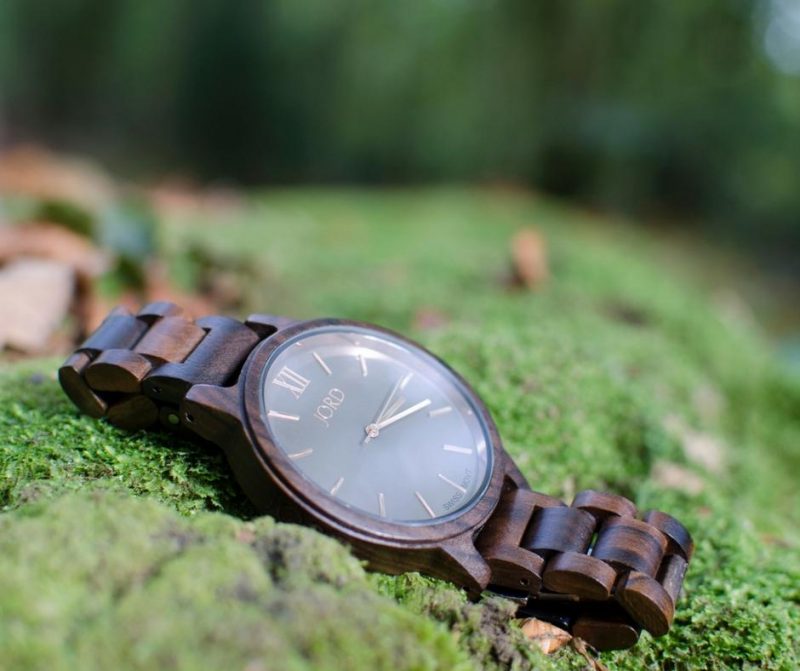
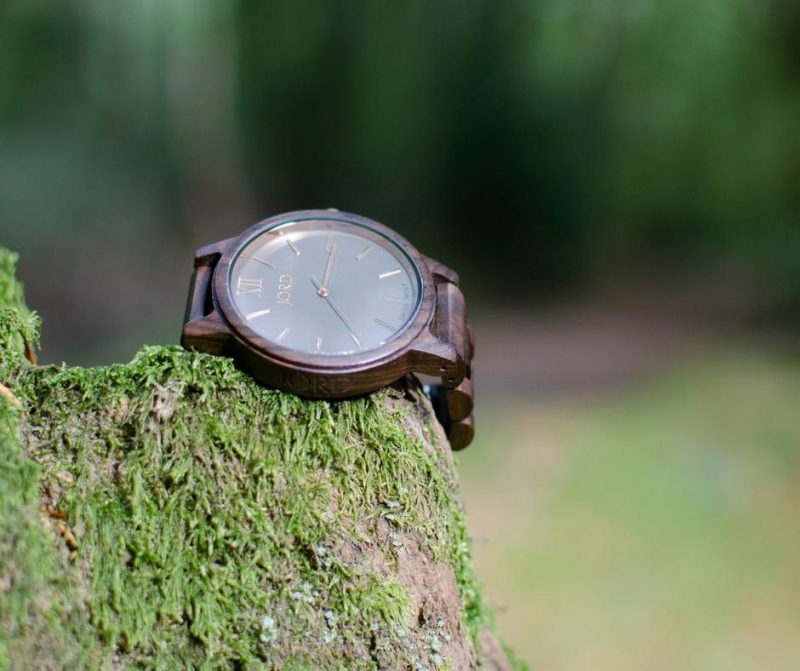
I love the fact that, due to the nature of the wood, all the watches are ever so slightly different.  I’ve always liked things that are unique, and I would definitely call this a unique watch!

The dark sandalwood and smoke watch that I chose is absolutely gorgeous.

I love how well the colour of the watchface goes with the wood of the strap.  And I think it’s really striking, yet quite subtle at the same time.

I’ve already had loads of compliments on it!

wooden-watch-jord-001

Now, here’s the exciting part!

You can win a $75 voucher to use on the Jord website just be clicking here and entering the competition.  And even if you don’t win, every person who enters will get a $20 voucher!

So, what are you waiting for, go and enter now for your chance to win!  The competition ends on Sunday 30th October 2016.

I’d love to know what you think of my new watch.  

Have you seen a wooden watch before?  Is it something you’d wear?  Have you been over to the Jord website and chosen your favourite?!  Leave me a comment and let me know.


Luxury Wood Watch

This post was sponsored by Jord watches.


real-baking-cookie-kit

#RealBaking review – Cake pop kit, Cookie kit and Chocolate pen.

Oh we’ve been having some fun in the kitchen lately!

We recently reviewed the great baking set from Vivid Imaginations and had a lot of fun with that.

So Nerys and I were really quite keen to get stuck into the other sets we were sent to review.

Here are my thoughts on the cookie kit, chocolate pen and cake pop kit.


Real baking cookie kit

First up we spent a rainy afternoon trying out the cookie kit.

The set comes with a silicone baking sheet, a rolling pin, a rolling pin guide, a piping bag and a selection of cookie cutters.

real-baking-cookie-kit

As the set is designed for children aged 6+ everything in it is child-sized, which is lovely because it is nice and easy for a child to use it all, but it does also mean that you can’t make that much in one go with it.

As you can see from the photo you can only fit about 6 ‘normal’ sized biscuits on the little baking sheet, so you have to either make them in batches or do what we did and make lots of smaller biscuits and put the ones that don’t fit on a separate baking sheet to cook them.

The set comes with instructions on how to use the items included, but would be even better if it included a recipe or two.

With no recommendations in the kit it’s hard to know how much dough to make to work well with the size of the tray.

In the end I found a simple biscuit recipe that actually worked out really well and was nice and easy to make.

Nerys then really enjoyed rolling out the dough using the rolling guide to help her.

I have to admit I was a bit dubious about how well this would work.  I had visions of the whole thing just sliding around and her getting frustrated.  But actually she managed it really well and the guide really did help get the dough to a perfect thickness to then cut out the shapes.

real-baking-cookie-kit-rolling-guide

Once we’d used up all the dough we popped the biscuits in the oven for about 12 minutes.

I was really pleased with how well they came out!

real-baking-cookies

I would point out that even though the kit is called the ‘cookie kit’ you’re much better off finding a biscuit recipe rather than a cookie one.

Mainly because cookies quite often spread when you bake them, whereas biscuits will hold their shape better.

This kit comes with quite a nice selection of different cutters so it’s fab when they come out of the oven looking like the butterflies, flowers and stars that you wanted!


Real baking chocolate pen

Next we tested out the chocolate pen kit.

Oh I had such mixed feelings about this!  

On the one hand I was really excited to try it, because chocolate!  But on the other hand I just wasn’t sure how easy it would be to use.

And after reading the instructions I wasn’t feeling particularly reassured, because honestly it all looked quite fiddly.

In the set you get the Chocolate Pen, 3 mould trays, 4 nozzles & clamps, caps, 12 bags for chocolate and an instruction booklet.

real-baking-chocolate-pen

Firstly, I was a little bit disappointed when I realised that the pen requires batteries but these aren’t included.

Luckily we had some at home, but it was still a bit of a faff to dig out a screwdriver to put them in.

Secondly, I think the kit would be that little bit more special if there were a couple of bags of chocolate buttons in there, as this is what is recommended in the instruction booklet.  But there isn’t any chocolate included in the box.

Once we got started though I found that setting up the pen wasn’t quite as fiddly as I’d expected.  But I’m really not sure how well a 6 year old would manage if they tried to do it.

You have to fill one of the little bags with chocolate, attach a nozzle and clamp and then put the bag in warm water to melt the chocolate.

Once it’s all melted you put the bag into the pen and fasten it all up.  This part is a little fiddly but after you’ve done it once or twice it does get easier.

To get the pen to work you press the big button on it, which pushes a plunger inside the pen that then forces the chocolate out of the top of the nozzle.

You can then use it in two ways.

You can use the pen to fill up the chocolate moulds or you can draw freehand with it onto baking parchment.

We tried both and had a lot of fun.

The moulds I really liked.  There are quite a few to chose from and you can layer up colours if you feel fancy.  We only had milk chocolate in the house so ours are quite simple but I still think they came out really well.

And I think they’ll be lovely to make with the children to give to people at Christmas time.

real-baking-chocolate

As for drawing with the pen?  Well, maybe with a bit more practise we would get better but our results this time weren’t amazing!  The nozzle is quite big on the pen so I’m not quite sure how you could achieve the lovely delicate writing that’s shown on the box!

We ended up with a sort-of butterfly (my effort), a lovely muddy puddle (Nerys’ work) and a big flower with a leaf on the stem (a joint effort).

Not too shabby for a first attempt, but nothing like the examples on the box.

real-baking-chocolate-pen-001

My main feeling with this set is that, once you’ve got it up and running, it’s a lot of fun.

Nerys really enjoyed using it, and Rhys is desperate to have a try too.

It is tricky to get amazing results with it, but then it’s not claiming to be a professional tool.  To my mind, it’s a toy.  It’s supposed to just be fun, and to encourage children to want to bake more and get more involved in the kitchen.

And I think that it works well with that in mind.


Real baking cake pops

The last thing we tried out was the cake pop set.

And like with the chocolate pen, I was a bit apprehensive.

I’ve always loved the idea of cake pops but had never actually made them before because they always seemed a little complicated.  And at first glance this set didn’t make it look simple either, mainly because of the number of steps there are in the instructions!

In the kit you get 2 silicon mould sheets, 2 cone moulds, 1 mini doughnuts mould sheet and 12 lollipop sticks.

real-baking-cake-pop-kit

First impressions are that the pieces all feel nice quality, but there’s not much to the kit.

It seems a bit of shame that you can only make 4 cake pops at a time, it would be so much better if there were 2 of the mould sets in there.

And the little doughnut mould is sweet, but slightly random as no recipes are provided so I’m not really sure what to do with it.

The kit comes with 2 cone moulds as well, so you can either just make basic cake pops or you can melt chocolate and pour it into the moulds and then put the cake pops on top of those, to make sort of cake ice creams.

In the end we decided to just go for the basic cake pops, but I’ve promised Rhys we’ll get the kit out again soon and make the cones too!

To make the cake pops you make up your cake mix (I used my basic 2-4-4-4 fairy cake recipe) and then spoon some into one half of the silicone mould, up to the line.  Then you put the other half on top and press it down to secure it in place.

Then bake!

As the cakes rise they form themselves into nice little balls of cake.

I was so sceptical about this.

I really didn’t think it would work properly so I was amazed when I popped open the mould after the cakes had cooled to find these neat little cake balls!

real-baking-cake-pops

The next step then is to simply put the lolly stick in and then dip the cake pops in melted chocolate and decorate.

The issue I had here is that there’s nothing in the kit to use to stand the cake pops up while the chocolate hardens.  So you’d have to lie them down on some greaseproof paper or something similar, resulting in a random flat spot of chocolate.

I got lucky and had a plastic tub waiting to be recycled that actually had 4 little holes in the bottom, just the right size for the sticks.  So I put my cakes pops in there for the topping to set.  I would love it though if the kit came with something like that to make life a bit easier!

The end result though is really good I think.  

Not quite bake off standard but still!  It’s just a bit of a shame that you can only bake 4 at a time.

real-baking-cake-pop-set

There are one or two little niggles with all three baking sets that we tested.

Each set could do with having a few more key bits of kit to them, and it would be really nice if there were recipe ideas in the boxes to get you started.

Overall though, we really like them.

We’ve had a lot of fun and really enjoyed baking something other than our standard fairy cakes.

And I think that’s the key to these kits.

They’re fun.

They’re meant as a way to get kids interested in baking, and trying new skills, and having fun.

And from my experience with them they succeed on all those points.

My adult self has a few nit-picky reservations but the child in me, who always loved the look of things like Mr Frosty and easy bake ovens, really enjoyed them!

We’ll definitely be getting all these sets out again over the coming months.


Disclaimer – I was sent the kits for the purpose of this review but all words and opinions are my own.